By: Rachel Bake
Learning how to draw a face is a skill that requires practice, patience, and creativity. Whether you are an aspiring artist or just someone who wants to try their hand at drawing a face, understanding the basics is the first step. Here are some tips for drawing a realistic face:
Face Shape
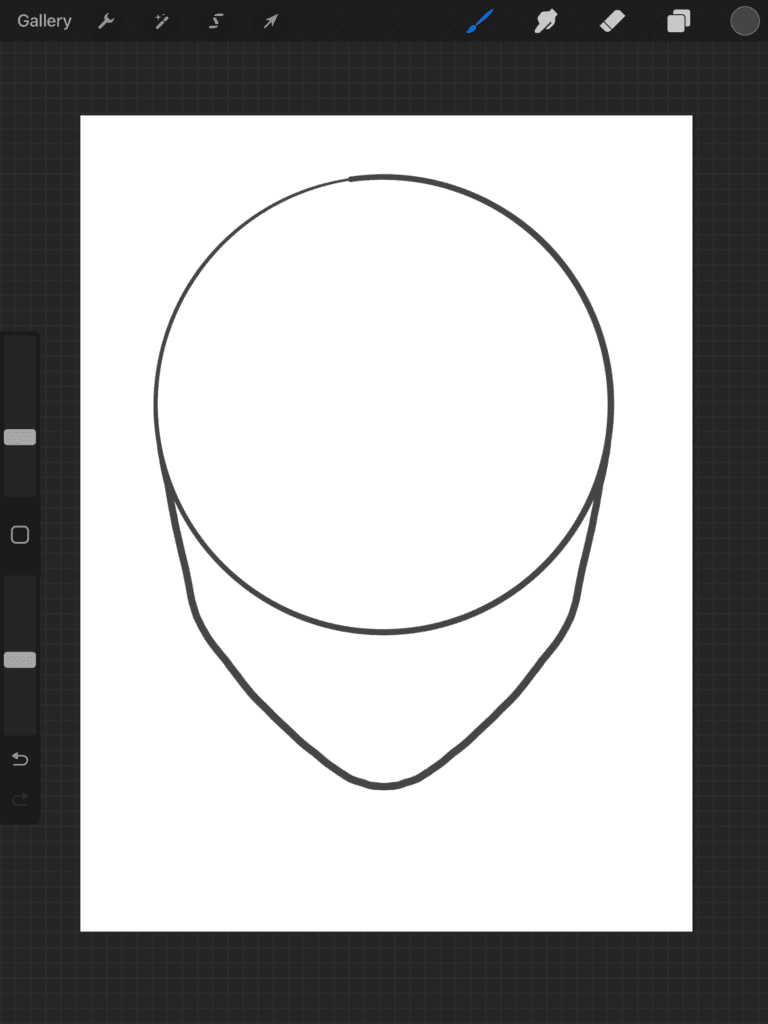
Start with the basic shape. A face is made up of a combination of basic shapes such as circles, ovals, rectangles, and triangles. Start with a basic shape and work your way up. For example, draw a circle to represent the head and then add the shape of a chin below Before we add features we have to get sizing and placing down.
Proportion
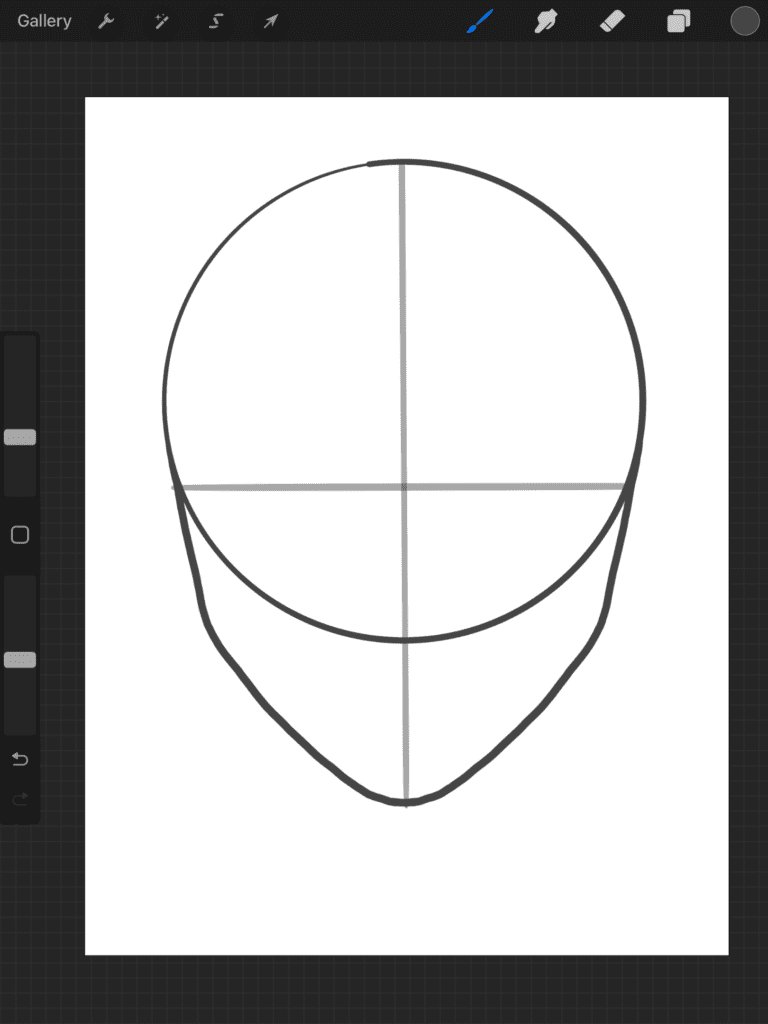
Pay attention to proportions. Proportions are one of the most important aspects of drawing a realistic face. Make sure that the eyes, nose, and mouth are all in proportion to the size of the head. Draw a line vertically down the center and another in the center going horizontal. The eyes are in the middle of the head and should go along that line. Finding the width of the eye will get easier as you practice. Each eye should be roughly one eye width apart. If their hair is out of the way, there should also be about one eye width of space on either side of the head.
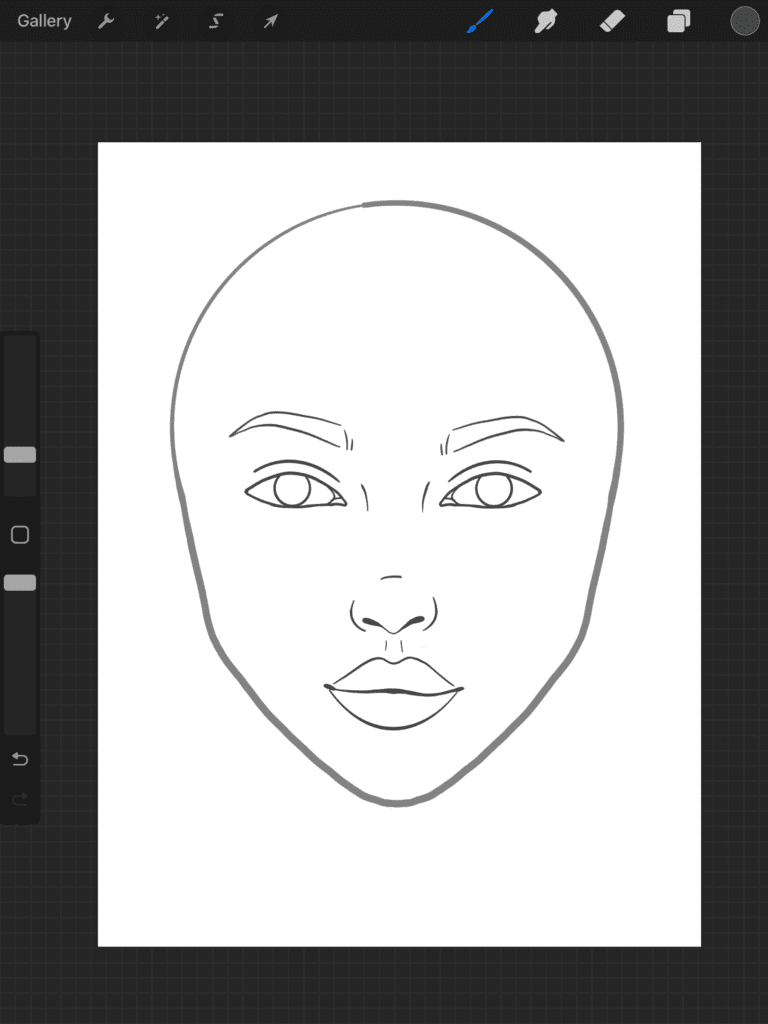
Add details. Once you have the basic shape and proportions down, it is time to add details. Start with the eyes, then move on to the nose and lips. Finally, add the ears and hair.

Nose Structure
Drawing a nose from the front can seem like a daunting task, but it doesn’t have to be! With a few simple steps, you can easily learn how to draw a nose from the front.
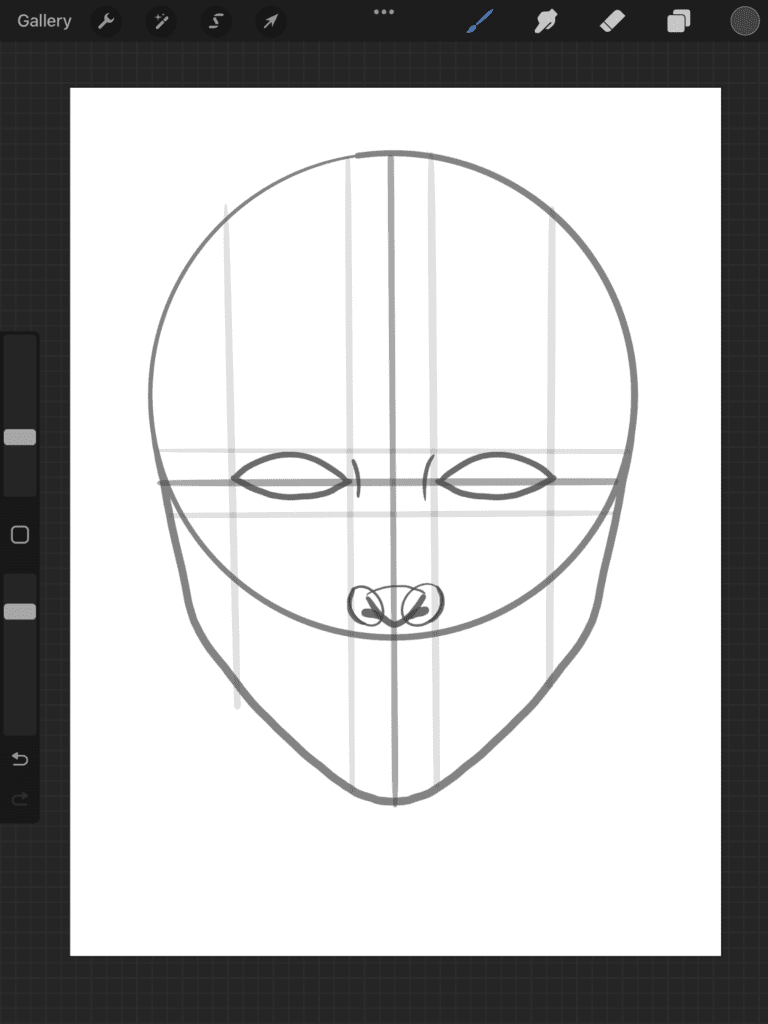
The first step is to draw the outline of the nose. The nose should be drawn in a shape similar to a triangle, but with a slight curve at the bottom. The nostrils should follow along that bottom line, with a crescent on either side. The width of the nose changes from person to person and race to race. For example, black people tend to have a wider nose than white europeans. Once the outline and the nostrils are drawn, it’s time to add some shading to the nose. Start by shading in the sides of the triangle, creating a shadow effect. This will give the nose a more three-dimensional look.
Next, add some shading to the nostrils. This should be done with a light pencil, and should be done in a way that adds depth and texture to the nose. You can also add some shading to the bridge of the nose, creating a more natural look.
Nose Details
The next step is to add the final details to the nose. This includes drawing the sides of the nose, as well as the tip. To draw the sides of the nose, start by drawing two curved lines at the sides of the nose. Then, add small amounts of shading to the sides of the nose, blending in the lines. Finally, add some shading to the tip of the nose. Start by drawing a small line at the tip of the nose, and then blend in the shading with a light pencil. This will give the nose a more natural look. By following these simple steps, you can easily learn how to draw a nose from the front. It may take some practice to get the look just right, but with a little patience, you’ll be able to create a realistic looking nose in no time!
Lip Structure
Drawing lips is one of the most important aspects of facial features and can be a difficult task for many artists. Whether you are a beginner or an experienced artist, learning how to draw lips can be a challenging but rewarding endeavor. Here are some tips and tricks to help you get started drawing realistic lips.
First, it is important to understand the anatomy of the lips. The lips are composed of two parts: the upper lip and the lower lip. The lower lip is usually thicker than the lower lip and has a rounded shape. The upper lip is usually thinner than the lower lip and has a more pointed shape. Both lips also have a center that is slightly raised and has a dimple in the middle. Knowing the anatomy of the lips will help you when drawing them. To create the shape I start with four circles. They should together form a square type shape, with the top two being slightly smaller than the bottom. Then I draw the line of the mouth. Then connect the corners of the mouth with the circles to create the outline. If your reference has a cupid bow, follow the dip between the two top circles.
Second, use the correct pencils and materials. When drawing lips, it is important to use the right pencils and materials. Graphite pencils are the best choice for drawing lips, as they provide a smooth and even finish. Charcoal pencils or pastels can also be used, but they can be harder to control and may produce a rougher result. It is also important to use a good quality paper that is thick enough to handle the pencils and other materials.

Lip Details
Third, use light lines. When drawing the outline of the lips, use light lines to sketch out the shape before adding darker lines. This will help you get the shape of the lips just right. Once you have the outline of the lips, you can then start adding darker lines to define the shape more clearly and add more depth.
Lip Shading
Fourth, use shading to add realism. When drawing the lips, it is important to add shading to create a realistic look. This can be done by using a blending stump or blending stick to add shadows and highlights. Start by using light pencil strokes to create the basic shape of the lips and then use the blending tool to add shadows and highlights. This will give the lips a more realistic look.
Finally, practice, practice, practice. Drawing lips takes time and practice. Don’t be discouraged if you don’t get it right the first time. Keep practicing and soon you’ll be able to draw realistic lips with ease. Drawing lips can be a difficult task, but with these tips and tricks you will be able to draw realistic lips in no time. Remember to use the correct pencils and materials, draw light lines, add shading, and practice, practice, practice. With enough practice, you’ll be able to draw realistic lips with ease.
Eyes
Refer to my How to Draw An Eye Blog!
How to Draw Eyes – Step by Step – Allister Arts
Finishing Touches
Now we continue to shade and blend. Start with the eyes and use a light pencil to add some shadows and highlights. Then add shadows and highlights to the nose, mouth, and ears as well. Finally, use a blending tool to blend all of the shadows and highlights together. Shading makes up a lot of what goes into a face. It creates the little details that bring it to life.Add the finishing touches. Add some wrinkles and freckles to the face to make it look more realistic. You can also use colored pencils to add a little bit of color to the face.
Practice
Learning how to draw a face is a skill that requires practice, patience, and creativity. By following these tips, you can create a realistic face in no time. Remember to have fun and experiment with different techniques to find the best one for you. With enough practice, you will be able to draw a realistic face with ease.