By Rachel Bake
Starting Up
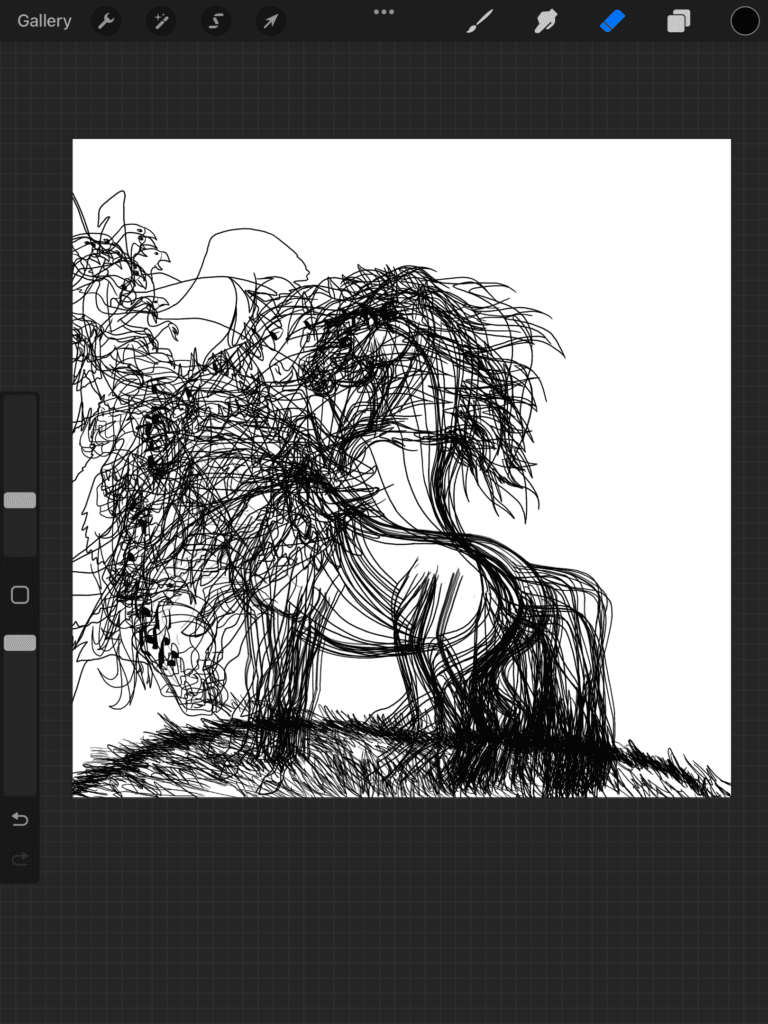
Animation can seem like quite a feat. But once you are familiar with the tools, it is actually very easy. For this tutorial I am using the program Procreate on a 9th generation iPad. My examples will pull from two different works I made. One is a more detailed, many framed animation of a horse, and the other is a simple puppy wagging its tail GIF.
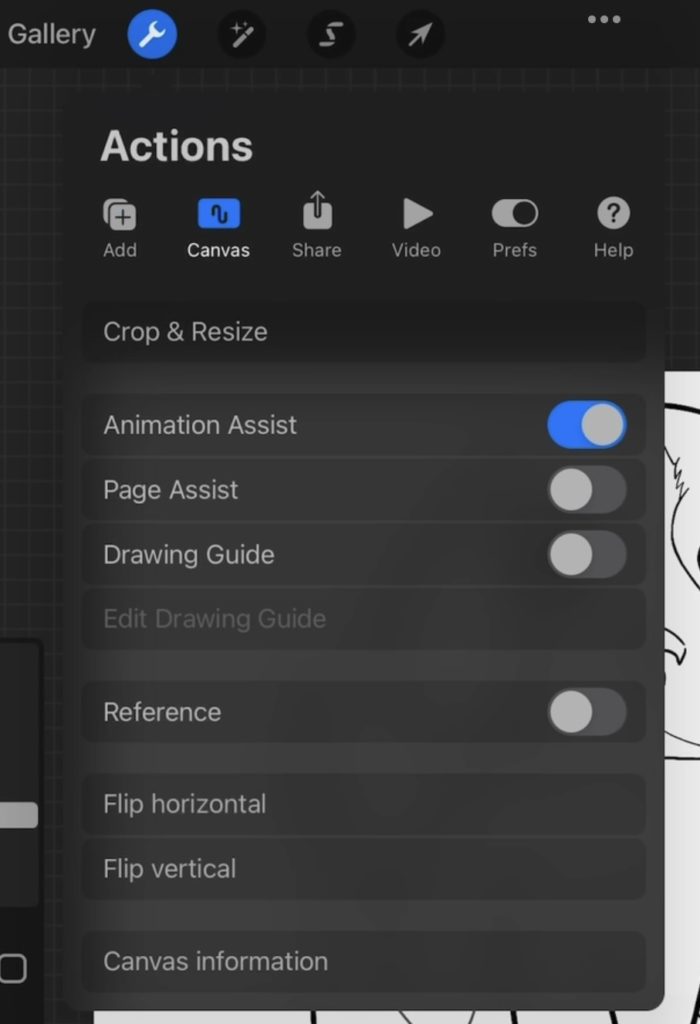
The first thing to go over is what settings you should start with. Begin by opening a new canvas. Go to settings (the wrench icon)> crop and resize, and then make your canvas 2000 by 2000. Once you do that you will see a bar drop down that says “63 layers available”. The size of your canvas determines the amount of layers you can create, along with the level of detail.


Now you can draw your main image, just the line art. Once you have done that, click settings> canvas> and switch on animation assist.

Terms to Know
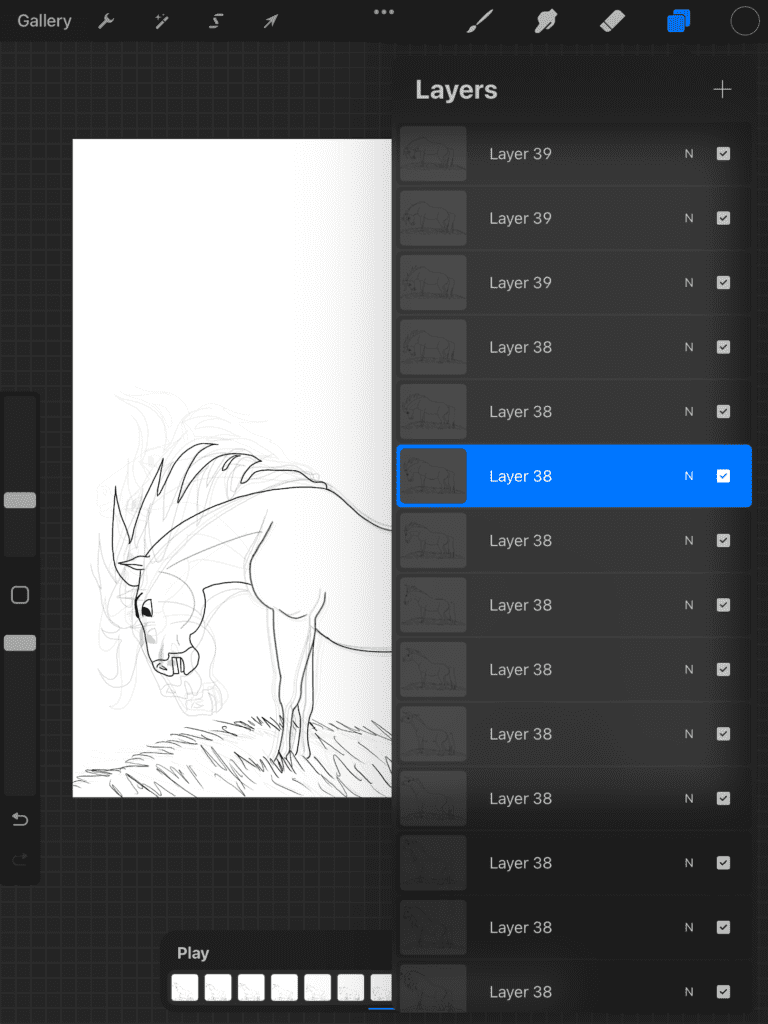
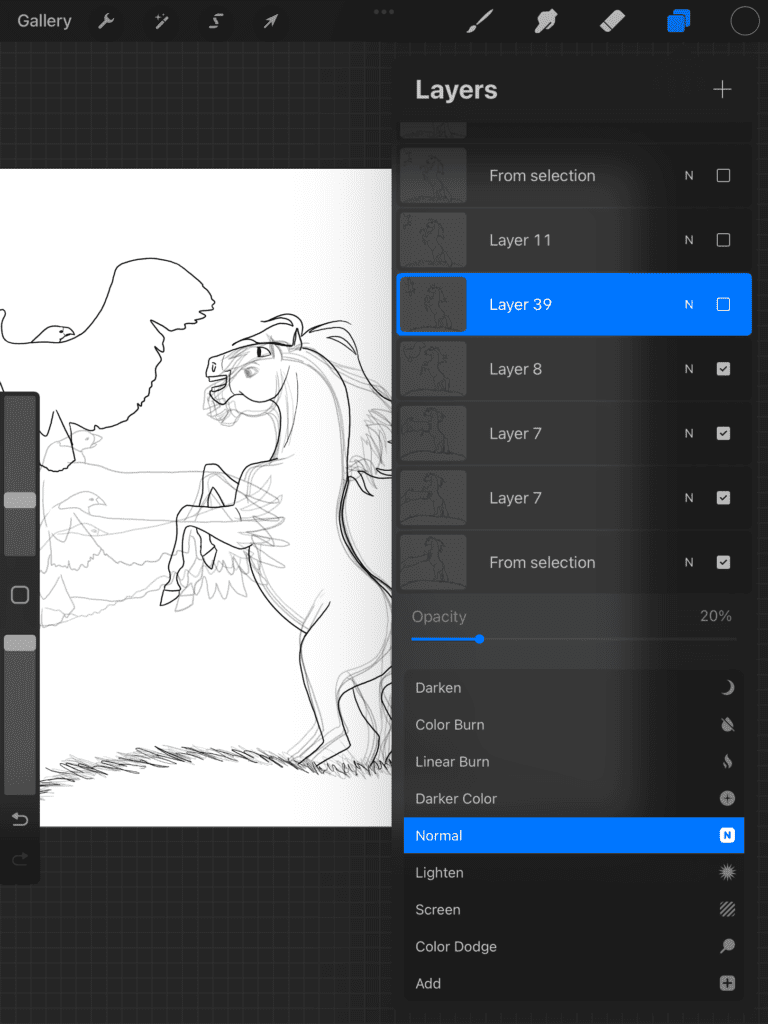
Layers – These are different sheets that you can draw on. You can edit the different sheets apart from each other and change the visibility.
Onion Skin – An onion skin is a specific format of layers. Onions skins are different animation frames that you have done that you can faintly see while working on the current layer. This is helpful for making smooth movements.
Opacity – Opacity is how opaque, or transparent something is. Onion skin layers have a very low opacity, they are very light and transparent.
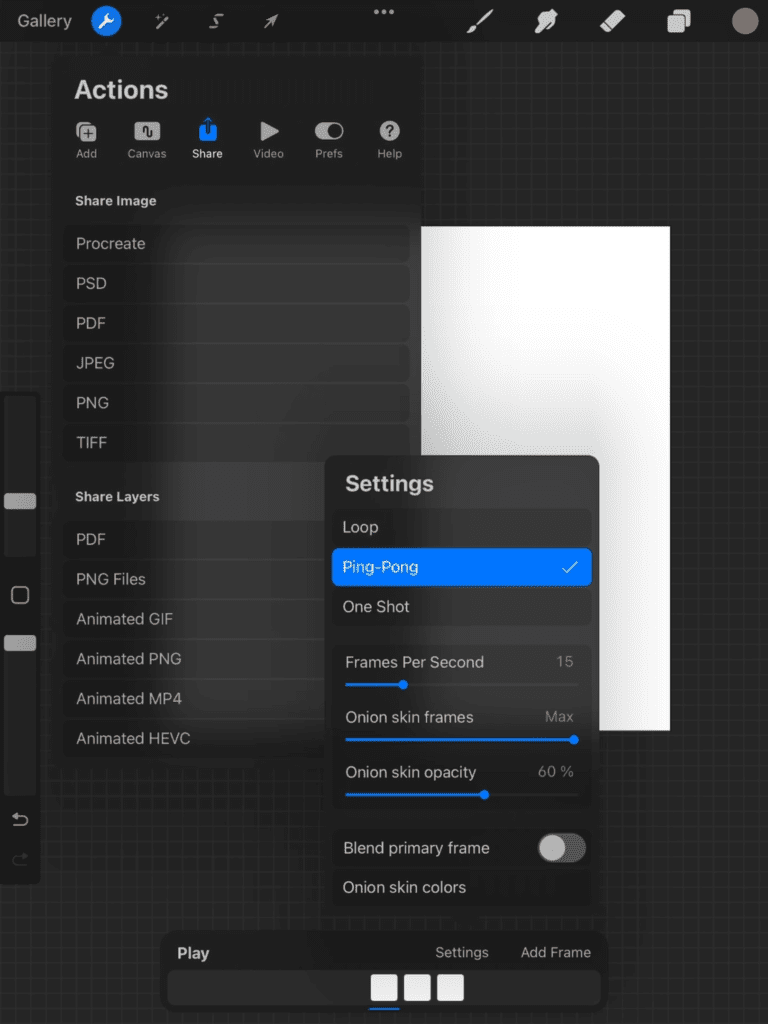
One Shot – This setting is for the final GIF. A one shot means that the animation will run once and stop. You would use this if it was part of a bigger animation and you want it to play through.
Ping Pong – This style will start at the first frame, play to the end, and then backwards through the frame. It repeats, creating a back and forth or, ping ponging.
Loop – A loop plays the animation from start to finish, and then plays again from the beginning, and repeats, rather than bouncing back and forth like the Ping Pong setting.
Benefits of Animation Assist
Animation Assist is very helpful because it takes care of the mundane, time consuming tasks. It automatically turns unselected layers into onion skins so that you don’t get confused. In addition, you can easily choose how many layers you want displayed. Simply change the “onion skin frames” number. I usually don’t display more than 4. Another fun feature animation assist has is the onion skin colors. When they are on, past frames are in green, and future frames are light gray. You can also customize the colors to what you like.

Without Animation Assist
Although it is possible to animate without using the assist, it is much more time consuming and difficult. First, in order to create an onion layer, you have to manually select the layer and adjust the opacity. And do it for every frame. You have to adjust which frames you see manually when you switch between them. You cannot easily switch layers at the bottom of the screen. And if you don’t make onion layers manually it looks like a mess.
Simple Gif Tutorial
Although I have been using examples from a 36 frame animation, it isn’t always that complicated. Here, I will take you through making a simple GIF of a dog wagging its tail.
To start, I drew a simple, uncolored outline of the dog. I then duplicated the layer twice. Next, only have the first two layers visible and turn on animation assist. Now go onto the second layer. Select the “S” shaped tool from the top left. Draw around the tail and then click the mouse select button on the top left. Select “uniform” from the bottom toolbar and move the tail down the butt. Fix any gaps or line ends. Repeat for the third layer, moving the tail underneath the second frame placement.

Now that that is done, make only the first layer visible. Before we start coloring, turn off animation assist. Create a layer underneath the first layer. Color on that bottom layer and then clean up. For this puppy, I started with brown, then colored black underneath it, and white underneath that. Merge the color layers. Duplicate it twice and put the color layer under its respective line art layer. Select and move the tail color the same way you did the line art earlier. Merge each color layer with its line art layer.
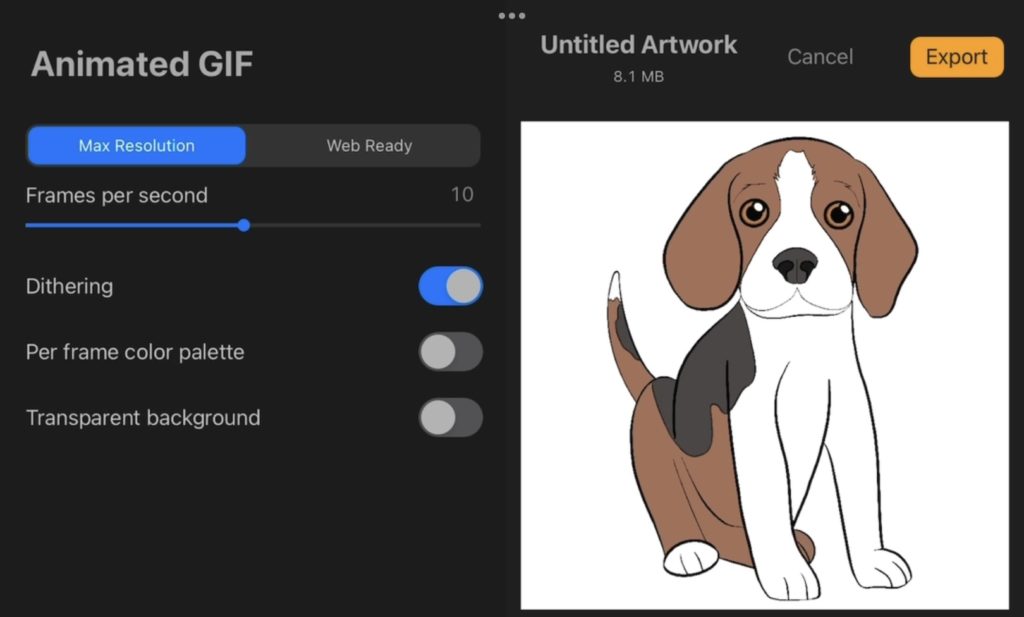
Now we can finish it up. Turn on animation assist and select the Ping Pong setting, this way the tail will wag back and forth. Now go to setting, then share, then chick animated GIF. Adjust the frames per second to your liking. (Hint: the less frames the slower it plays). You can either have a transparent background or keep the background. You can then export it and save it to photos!
Closing Thoughts
Obviously the beagle puppy was simple. It only took me 15 minutes. But you will notice my example pictures are much more complicated. I spent nearly 4 hours creating a two point seven second animated frame. Using a scene from the movie Spirit. It was very helpful to use animation assist to keep my 36 frames organized. I have gained a lot of respect for old school animators. Not only did they have to draw each frame, but for a long time it was all by hand with no computers. I think that animation is really useful practice for learning about movement and angles. Although it is not complicated, it can be time consuming, but I mostly think it is fun. The more I do it, the easier it gets, and becomes a relaxing pastime for me.
Share your animation creations and tell me if this tutorial helped you learn!