By Rachel Bake
When drawing people, it may seem daunting to draw their hair. It can be hard to depict the shape and make the hair not look flat. In this tutorial, I will show you how to depict many hair types and styles. From braids, to curled, to afro. This will be demonstrated on procreate but you can easily create them with other mediums as well.
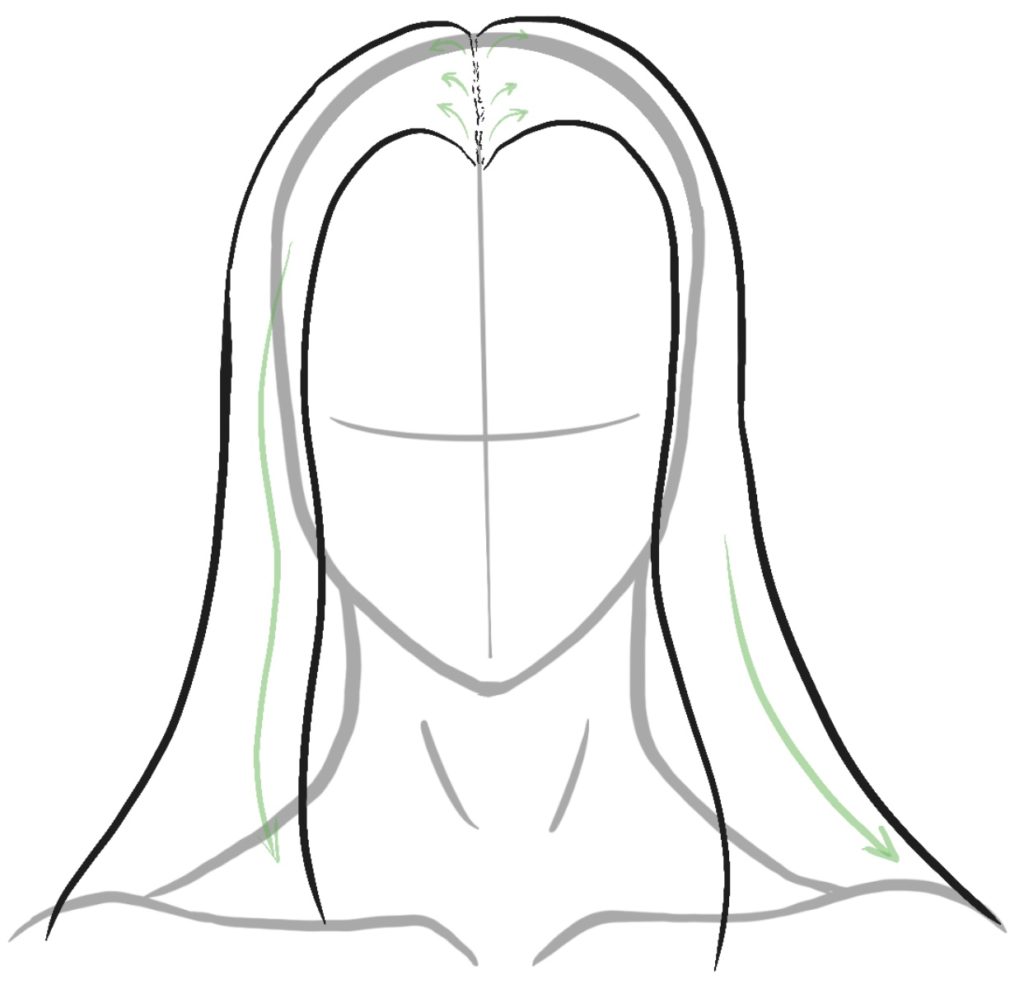
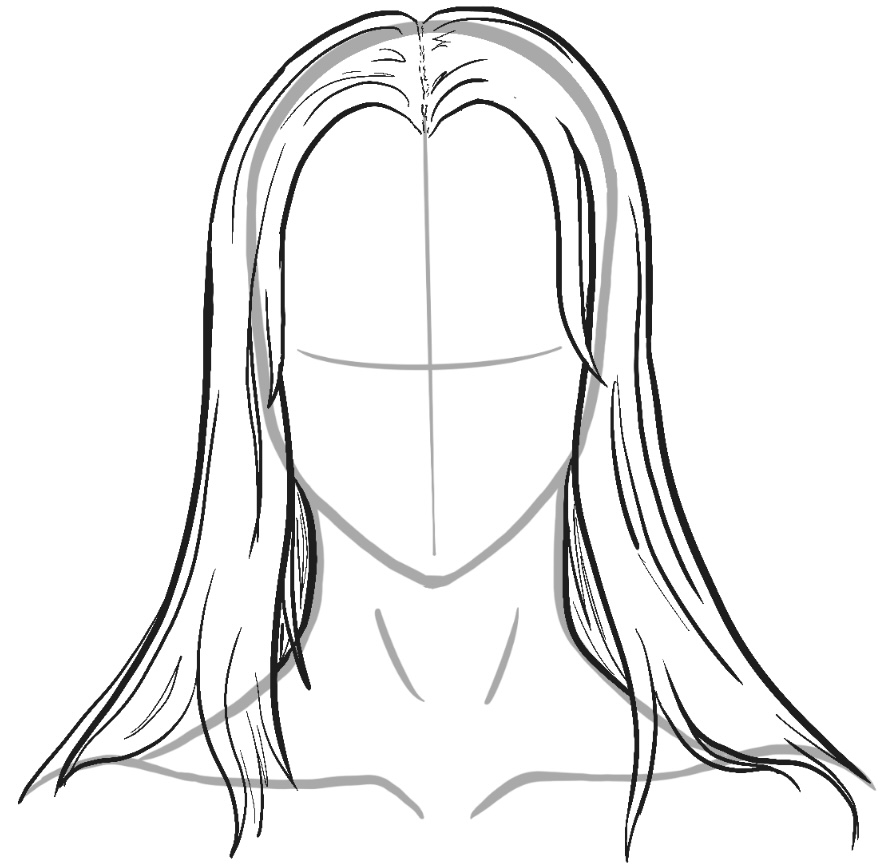
Straight Hair
Drawing straight hair is the simplest of all the hair types. The main issue is making sure the hair has body and doesn’t look flat. The first tip I can give to solve this problem starts at the roots. Find where the hair is parted, whether the middle or side. Rather than drawing the hair flat against the scalp, the hair goes up first, into a small curve back to the head.
The next tip I have is giving the hair movement. Rather than drawing the hair still and straight down, give it action. Another thing to remember is that this hair will follow curves on the body. The hair will curve out to rest on the shoulders. It will curve around the face. And some straight hair will curve at the ends. Or have the slightest wave near the end of the strand.

Wavy Hair
Wavy hair is also fairly simple. And you no longer have the problem of being flat. Obviously there are different levels of wavy hair, and you should adjust the techniques accordingly. Wavy hair doesn’t tend to group together as much as curly and coily hair. That being said, it still slightly does.
One thing to keep in mind is that the closer to the scalp the strand gets, the less wavy it will get, this is because of the weight of the strand below that wave. The shorter the hair is, or, the thicker/corser the strand is, the less drastic this change will be.
Another thing you can do to make it more realistic is mix hair types. Many wavy-haired individuals have some curly pieces mixed in, usually on the bottom layer. On the flip side, people with less wavy hair may have some straighter pieces on the top.
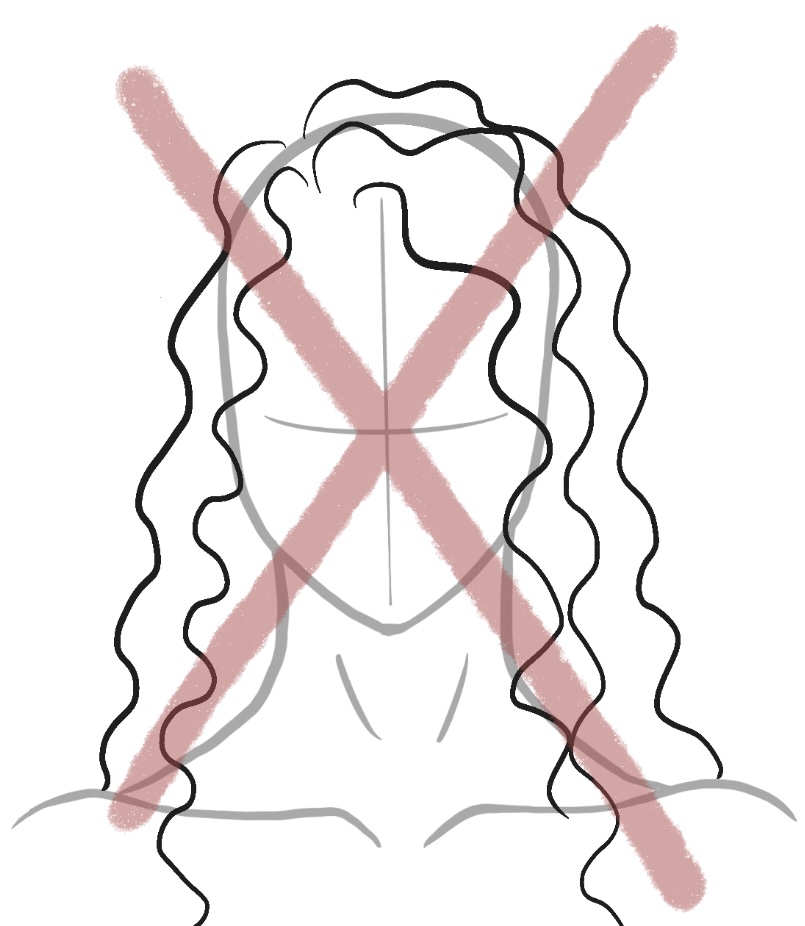
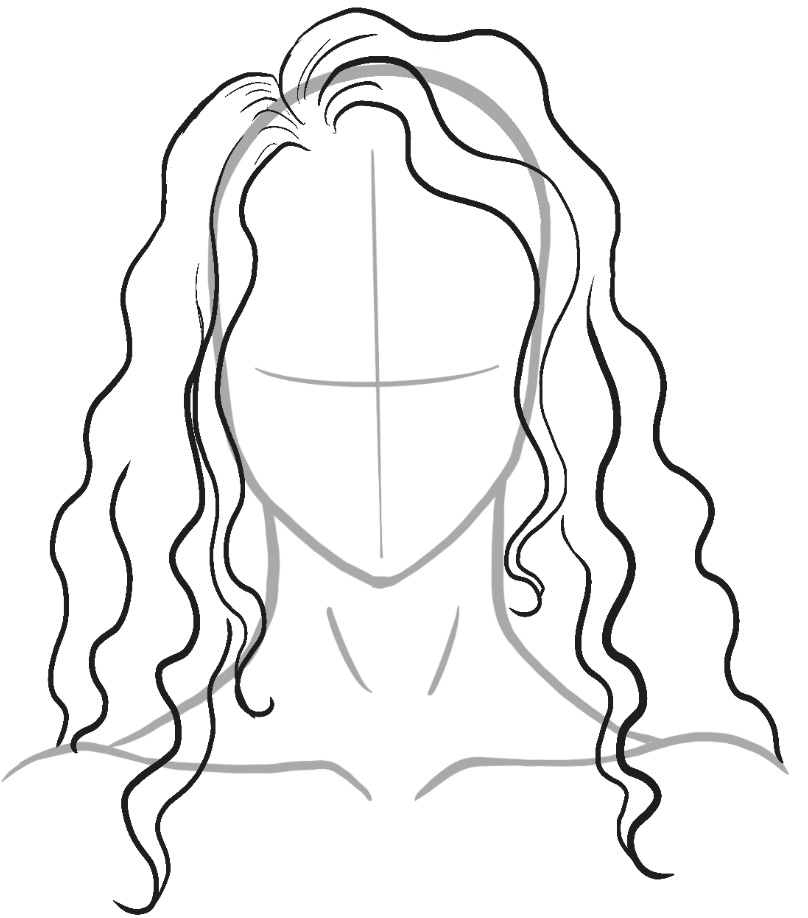

Curly Hair
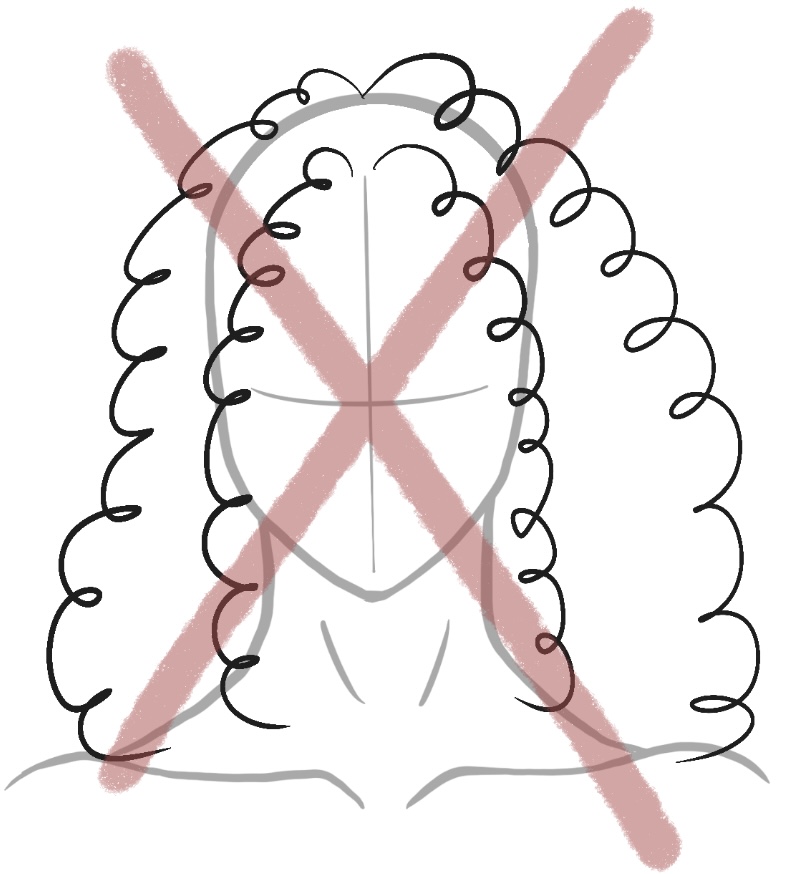
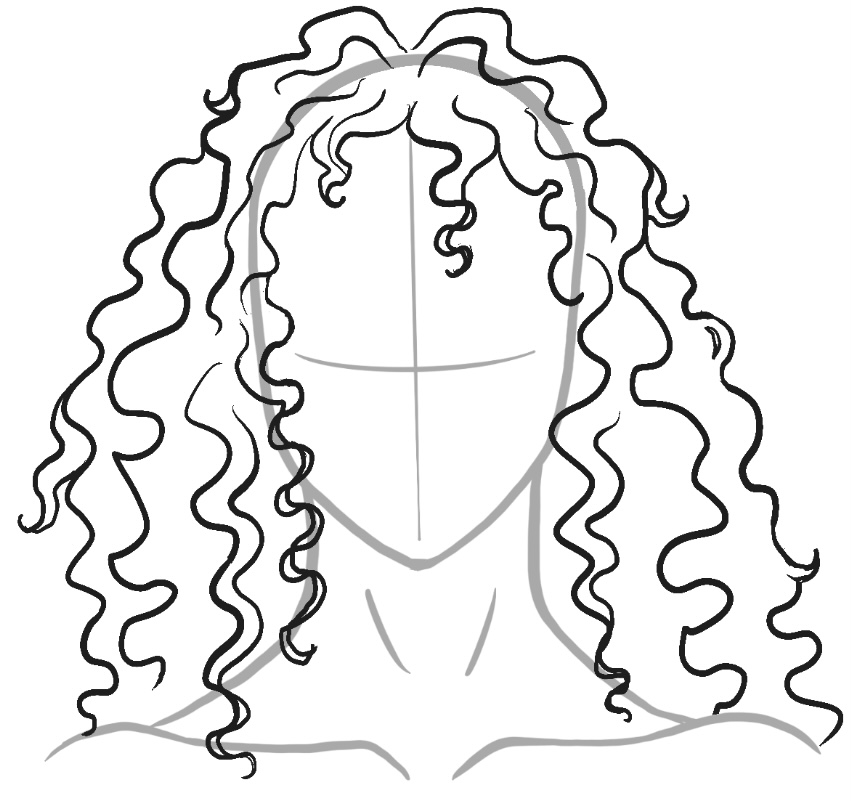
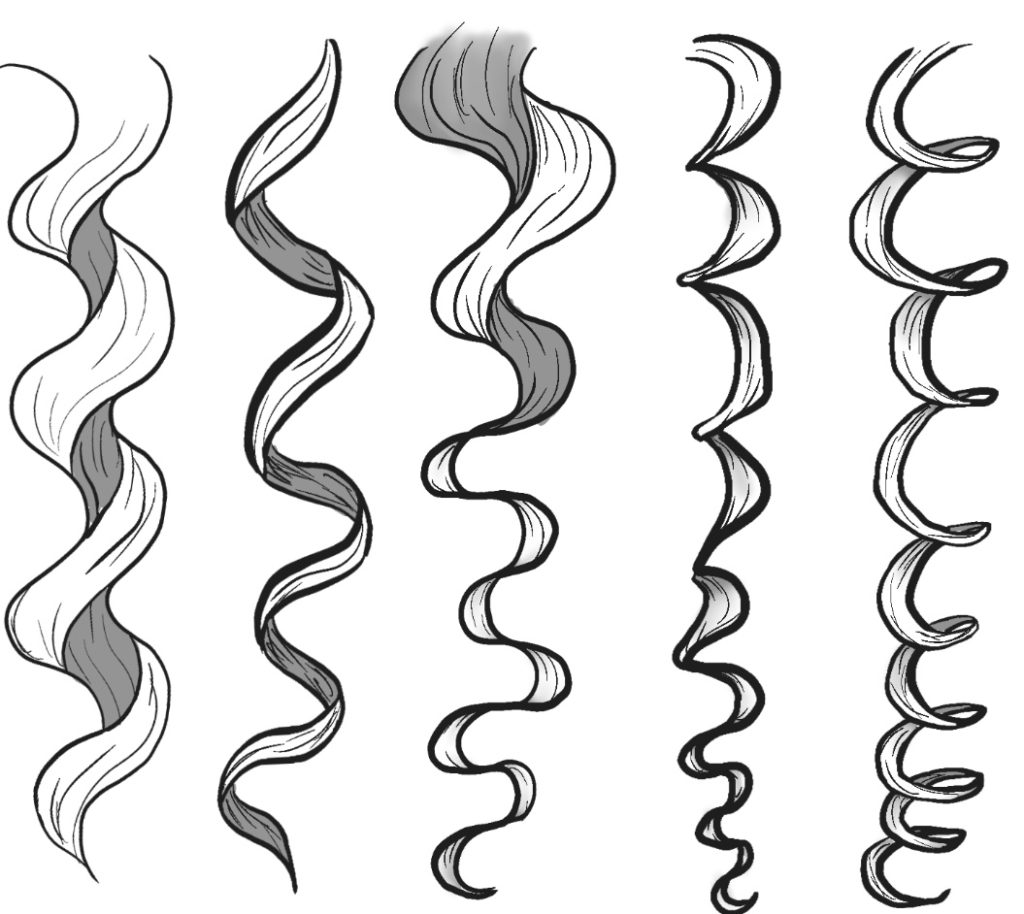
Curly hair usually starts right at the root, unlike some wavy hair. Rather than drawing spirals, curly hair is drawn as very dramatic and pronounced wavy hair. Something else to remember is that curly hair really groups together, and that some groups curl in a different direction. Depending on how someone styles their hair or the texture of their hair, the curl grouping and shapes will look different. Here below are a couple of examples. You will notice that one of them is drawn initially with a spiral. Only use these for very defined and prominent strands. Such as fly aways, or face framing pieces.
4A to 4C (Coily/Kinky Hair)
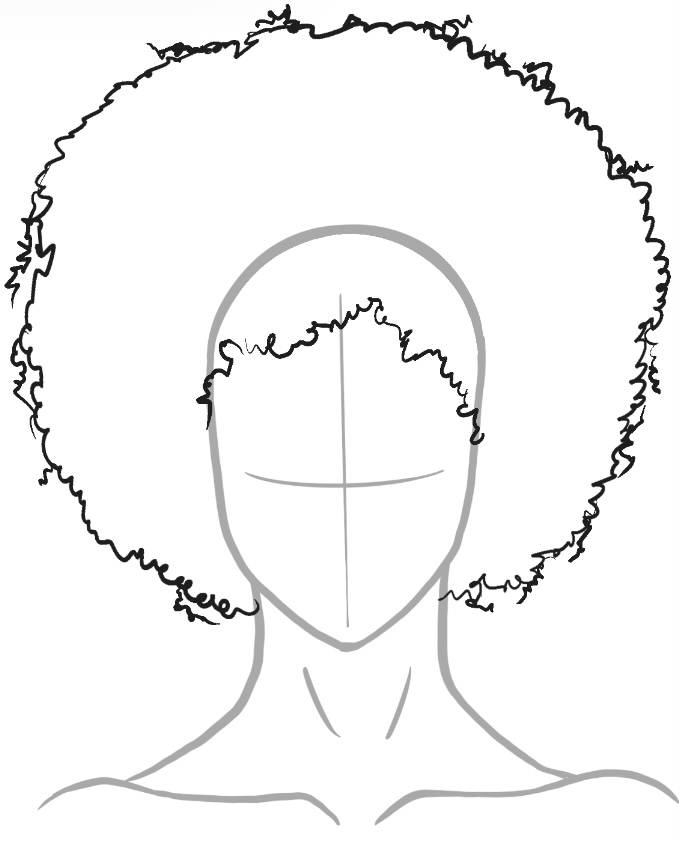
There are two distinctive ways in which curly, or kinky hair is drawn. One of which has much less defined edges. It usually happens with more Afro type hairstyles where the hair is brushed out and so it tends to get a little bit frizzier and more see through at the edges.When drawing individual strands, it works best to use a zigzag type stroke.This is because the coils are so tight that you don’t actually see the spiral from the front.Unless the hair is pulled.One thing to remember is that the.Curlier.The hair is.The puffier it will be, specifically at the root. Whereas with other hair types, it is fairly flat at the top of the head. Coily hair is so strong that it keeps its volume even at the top.
The other distinctive style of 4A to 4C hair is when it is styled with products such as gel. The curls tend to be more defined, and they get less frizzy. So, while the edges of the silhouette of the hair are still not straight and they’re pretty zigzagged, the actual strands and groupings are much more defined, and you can add a lot more of these very obviously spiraled flyaways and face framing pieces.


Now, another way that people with this hair type take care of their hair is with protective styles and different types of braids. Obviously, people with other hair types also braid their hair, but they do it differently and that brings us into this next section of how to draw braids.
Braided Hair
Drawing braided hair can seem intimidating at first. But once you break it down, it’s actually fairly easy to do. First you start with a zigzag. It doesn’t have to be super sharp and completely even, but it is a distinctive zigzag shape. Now depending on which direction, the braid is being created, whether under or over. The other strands will change the direction of this next step. For simplicity’s sake I am just going to demonstrate one way because it’s the same technique, just a different direction. So, from your zigzags you are going to find the corners of the zigzag and draw a curved line up to meet. The curved line above it. As you continue going down the line, this will create a braided shape. Now the closer you get to the end, the smaller that braid is going to be because the thinner the hair will get at the bottom. There are a few exceptions to this, but this only really happens with African American protective hairstyles where they add synthetic hair into the mix to make the braids longer and more even, and to help keep their hair safe and together.
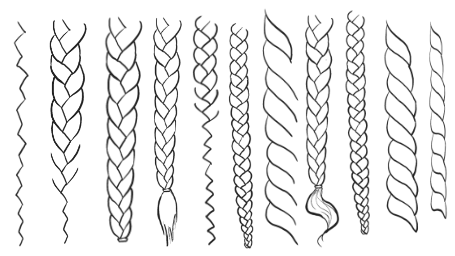
Now there is another braiding style called twisting, and this is much simpler to draw than the typical zigzag technique used before. Think of a Unicorn horn and how it kind of just spirals up. This is the same thing that happens to the hair, it is just drawing these angled, horizontal, groupings of hair that connect to one another as demonstrated below.
Finishing Touches
The last thing to remember is that hair is not all uniform and it is not perfect. With any hairstyle, unless it is completely gelled and slicked back, there are going to be hairs that do not stay with the rest of the group. There are going to be little wispies, there’s going to be flyaways even within a braid. There’s going to be hairs that are looser than the rest of them, and if somebody has layers that a lot of hair is going to stick out of the braid. A good way to make your hair look realistic is to remember this and add these pieces now. Adding too many it can make the individual’s hair look incredibly frizzy and un-styled, which sometimes you need to do, but most of the time, you are drawing an actual hairstyle. So, adding little touches like this and little baby hairs around the forehead and the ears can really just add those last little bits that make your drawing look real.
For more art tips make sure to read or other blog tutorials here at allisterarts.com.