By Rachel Bake
How to Draw a Side Profile
By: Rachel Bake
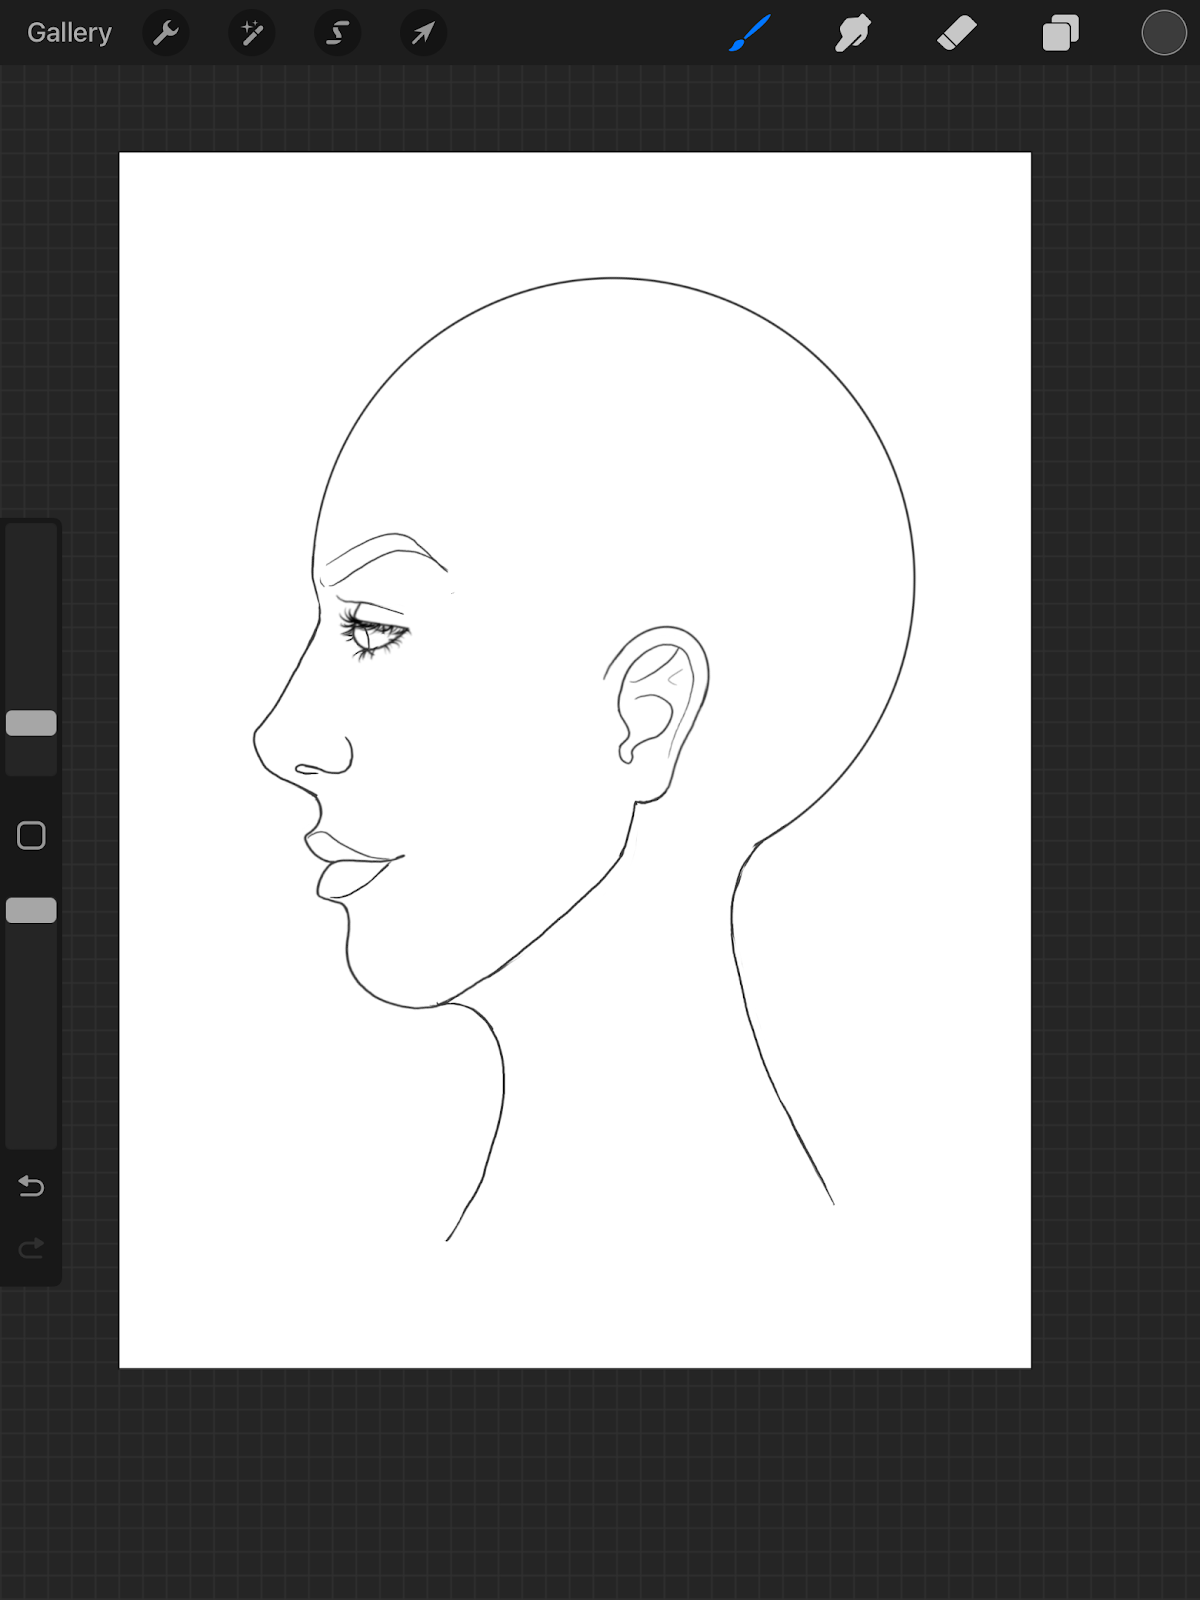
We all know that drawing people is difficult. Everyone is so different and it is hard to nail an overall technique. It can be even harder to draw a side profile simply because that is not how we see or imagine people usually. It can be hard to visualize what you see from the front to a completely different angle. This is a basic tutorial and guide on the steps to drawing a side profile.
Basic Structure and Nose
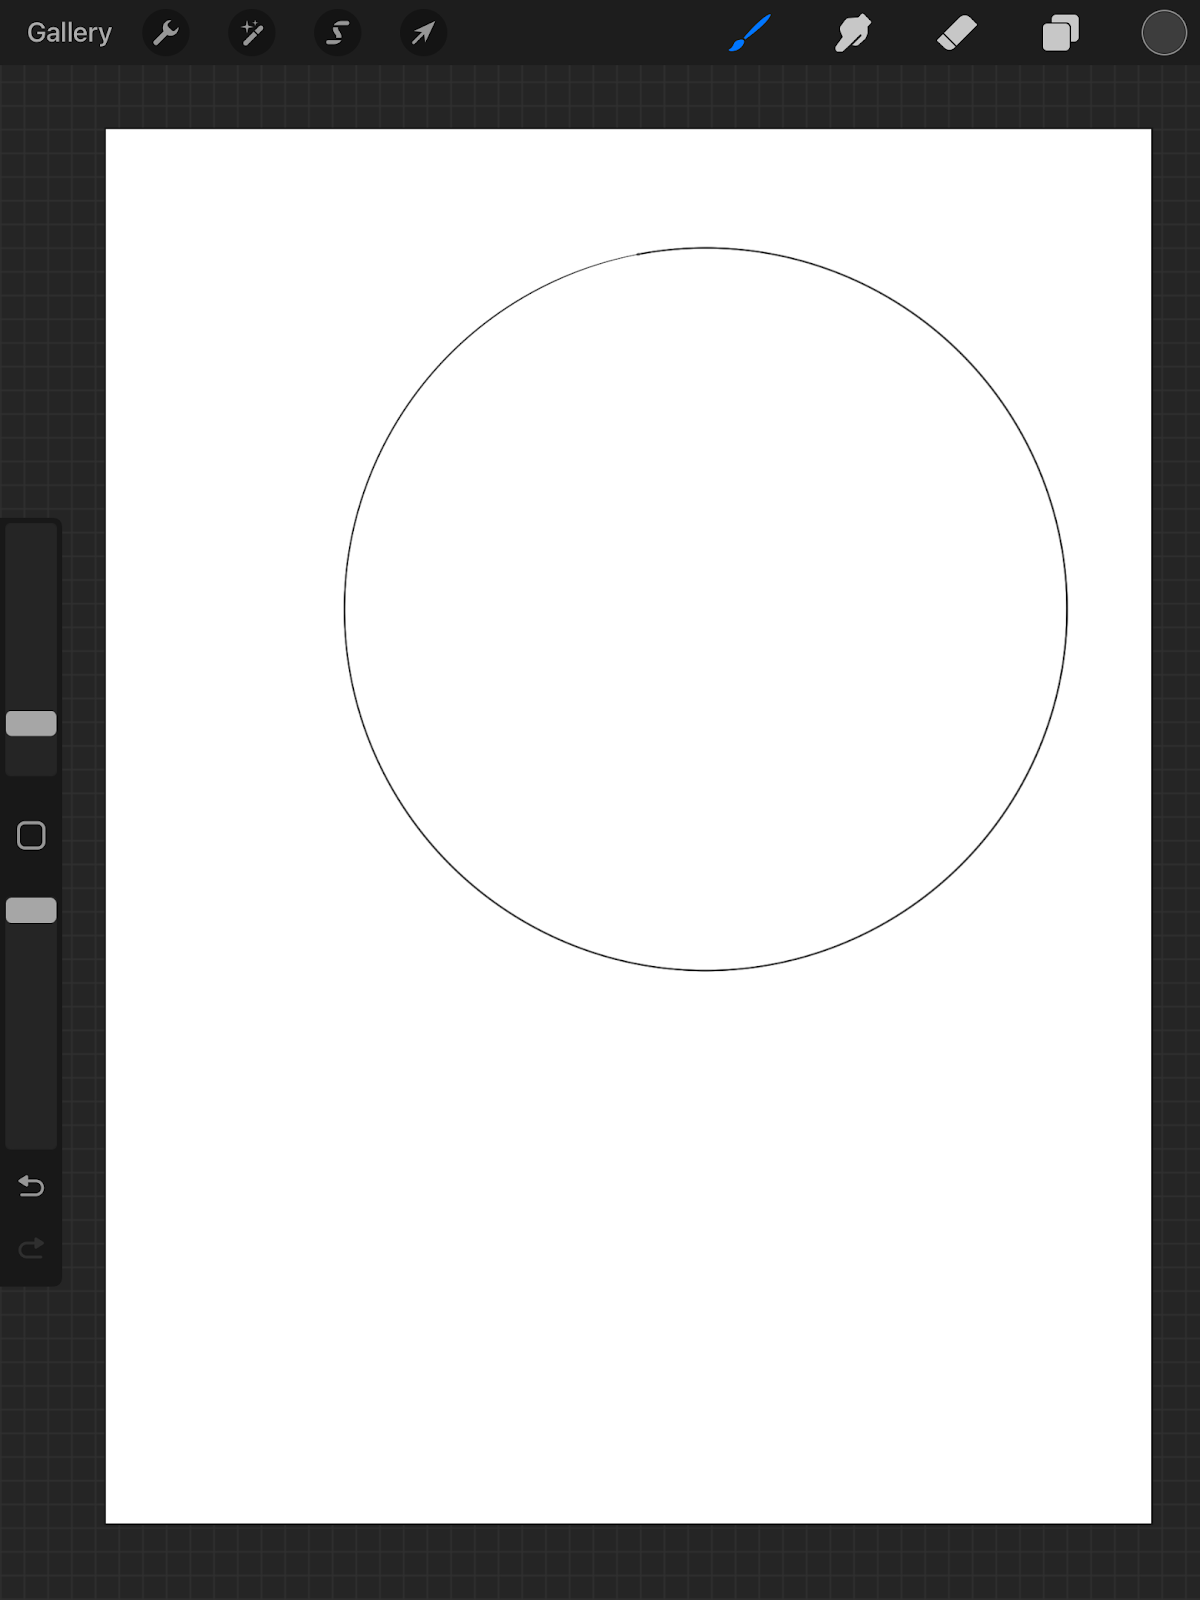
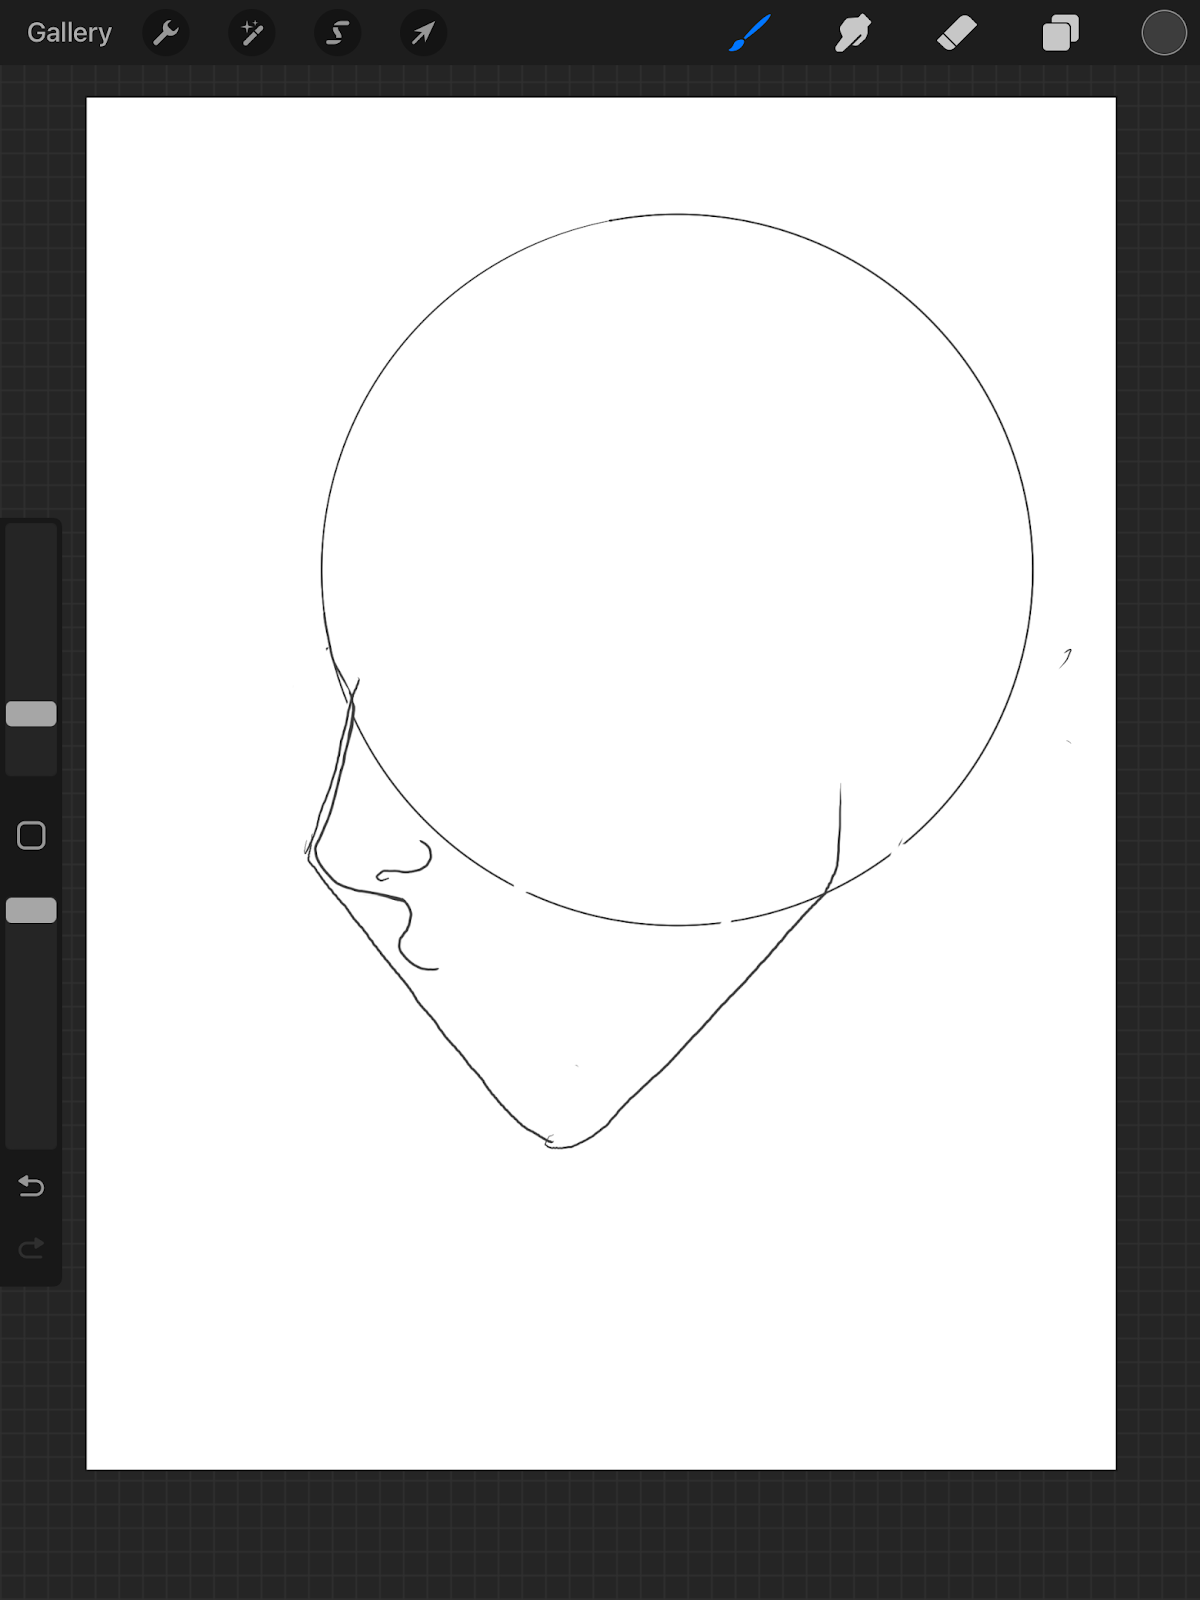
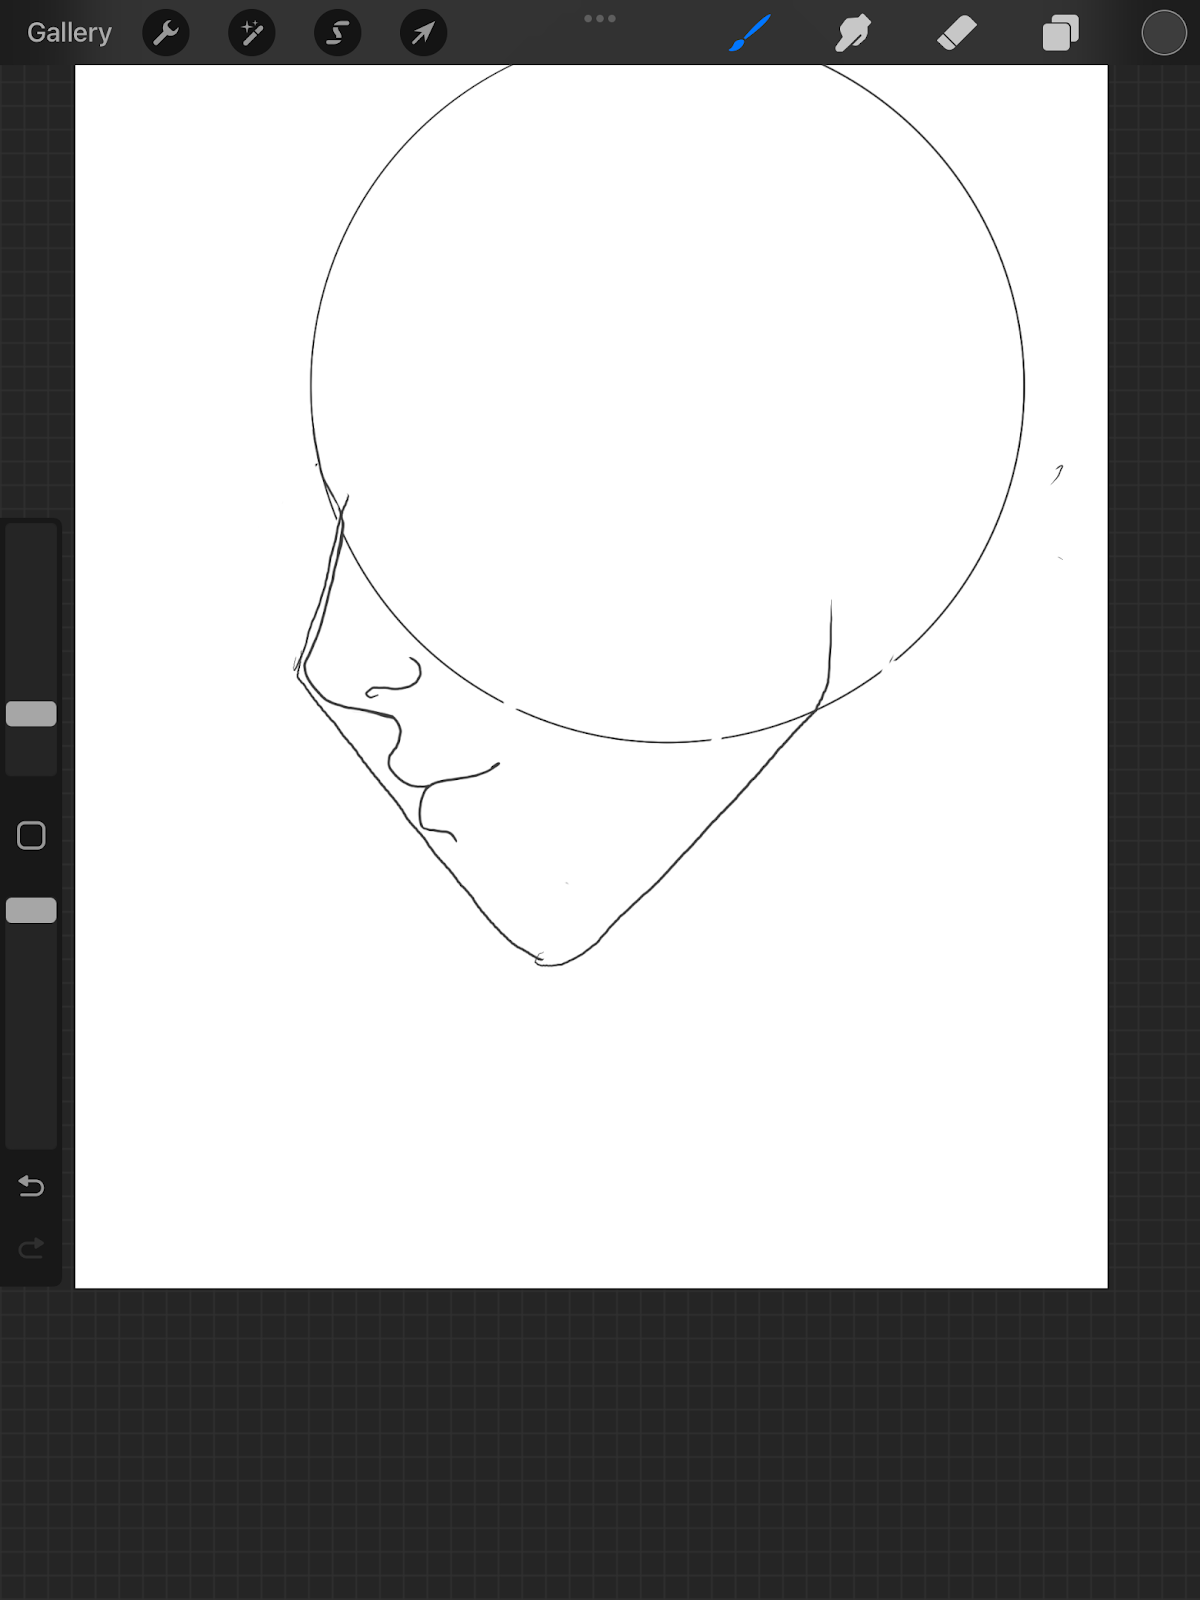
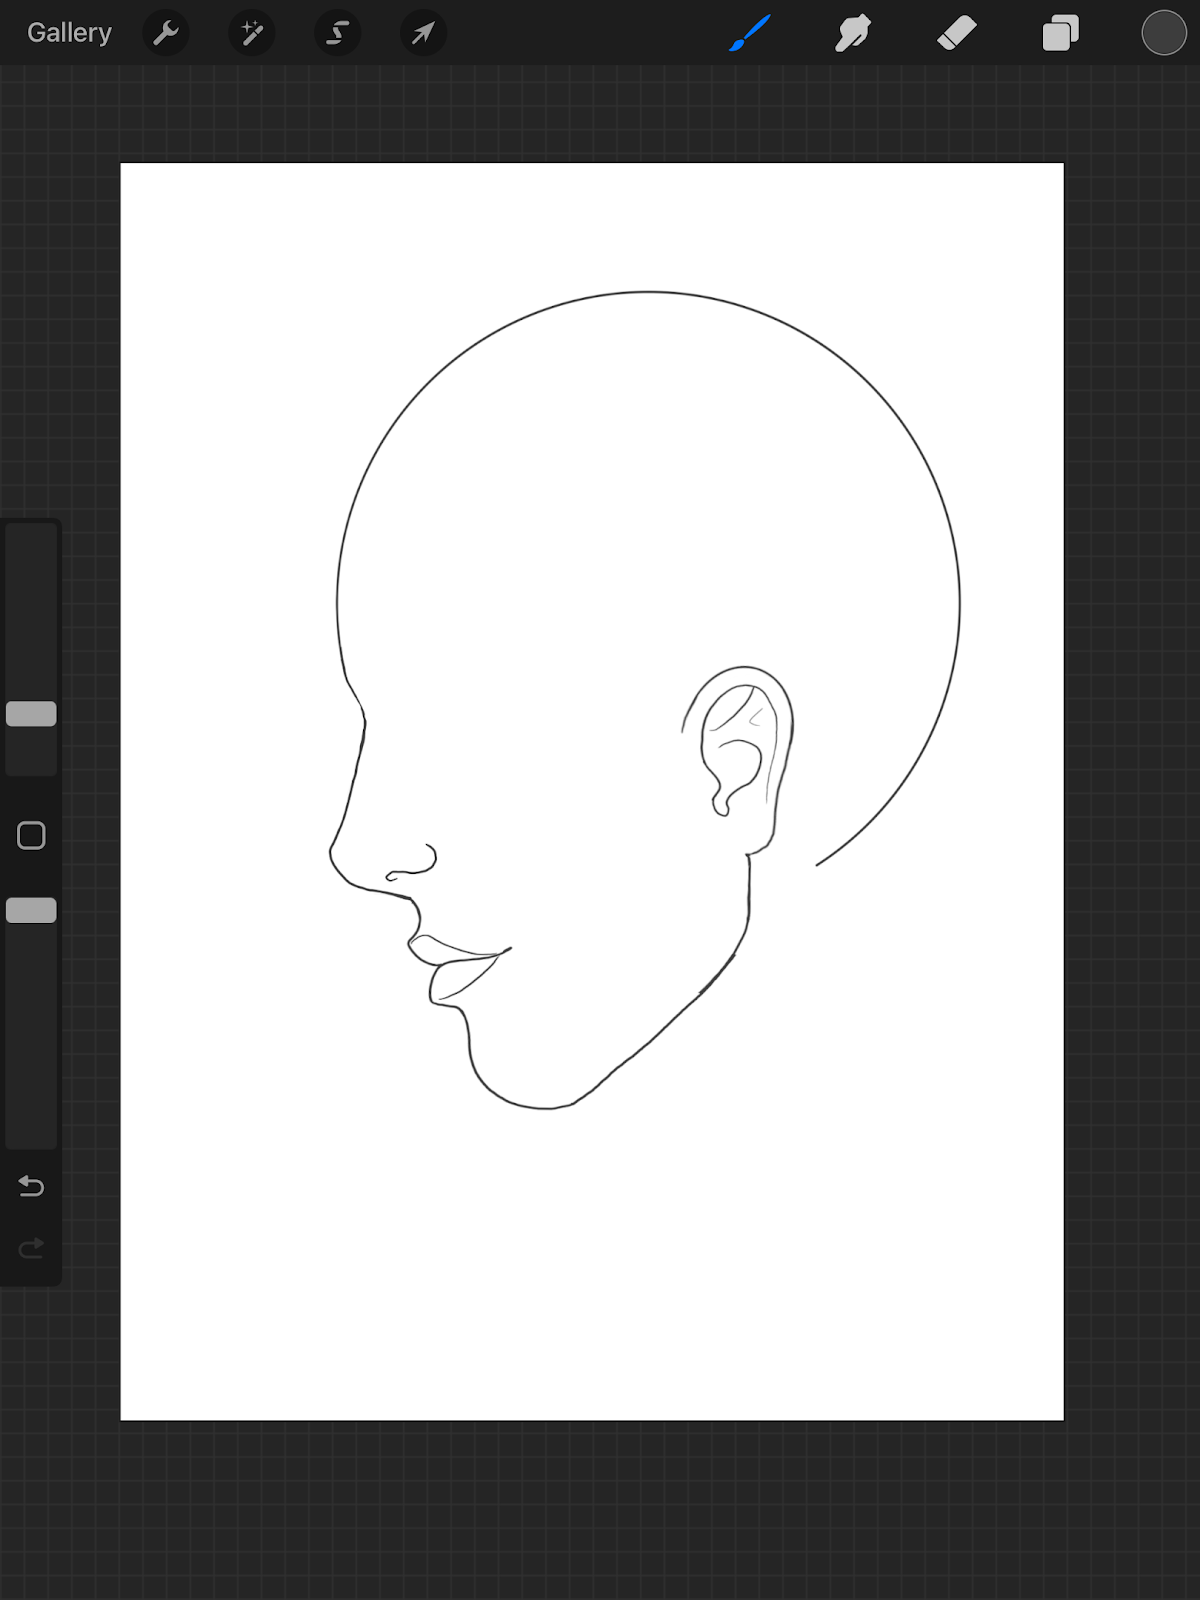
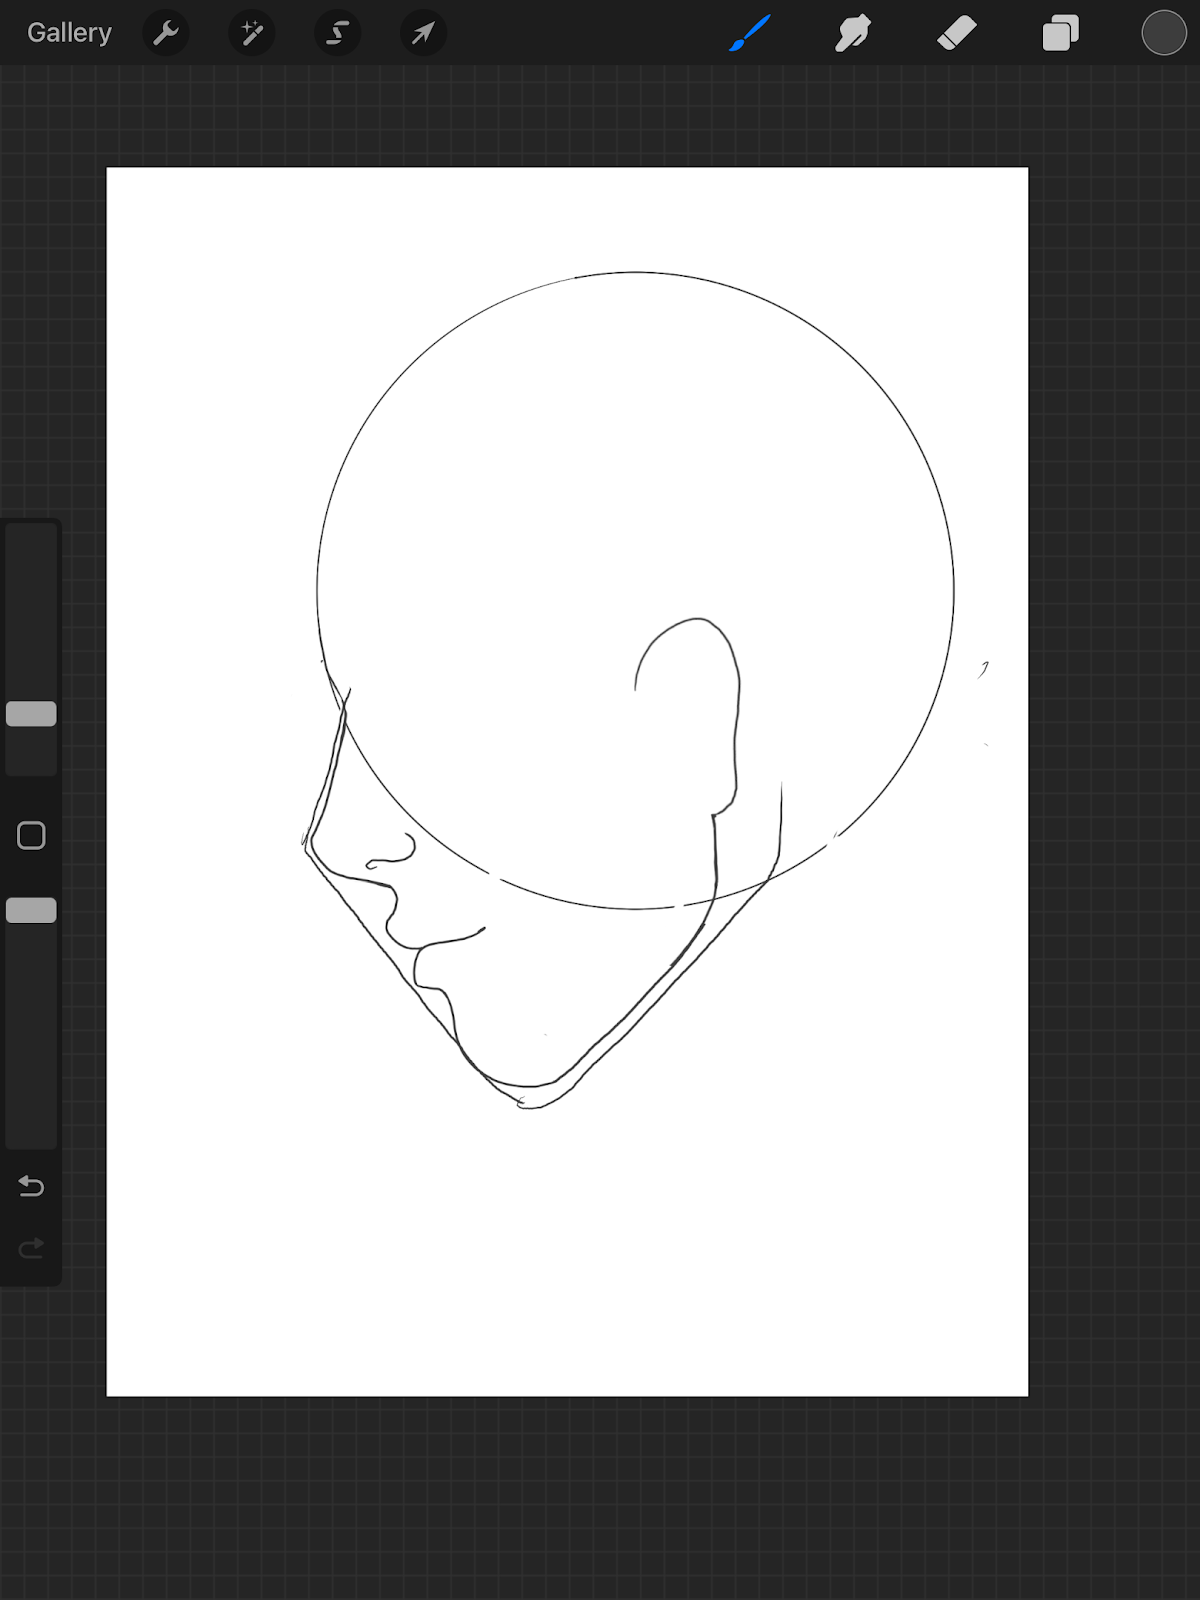
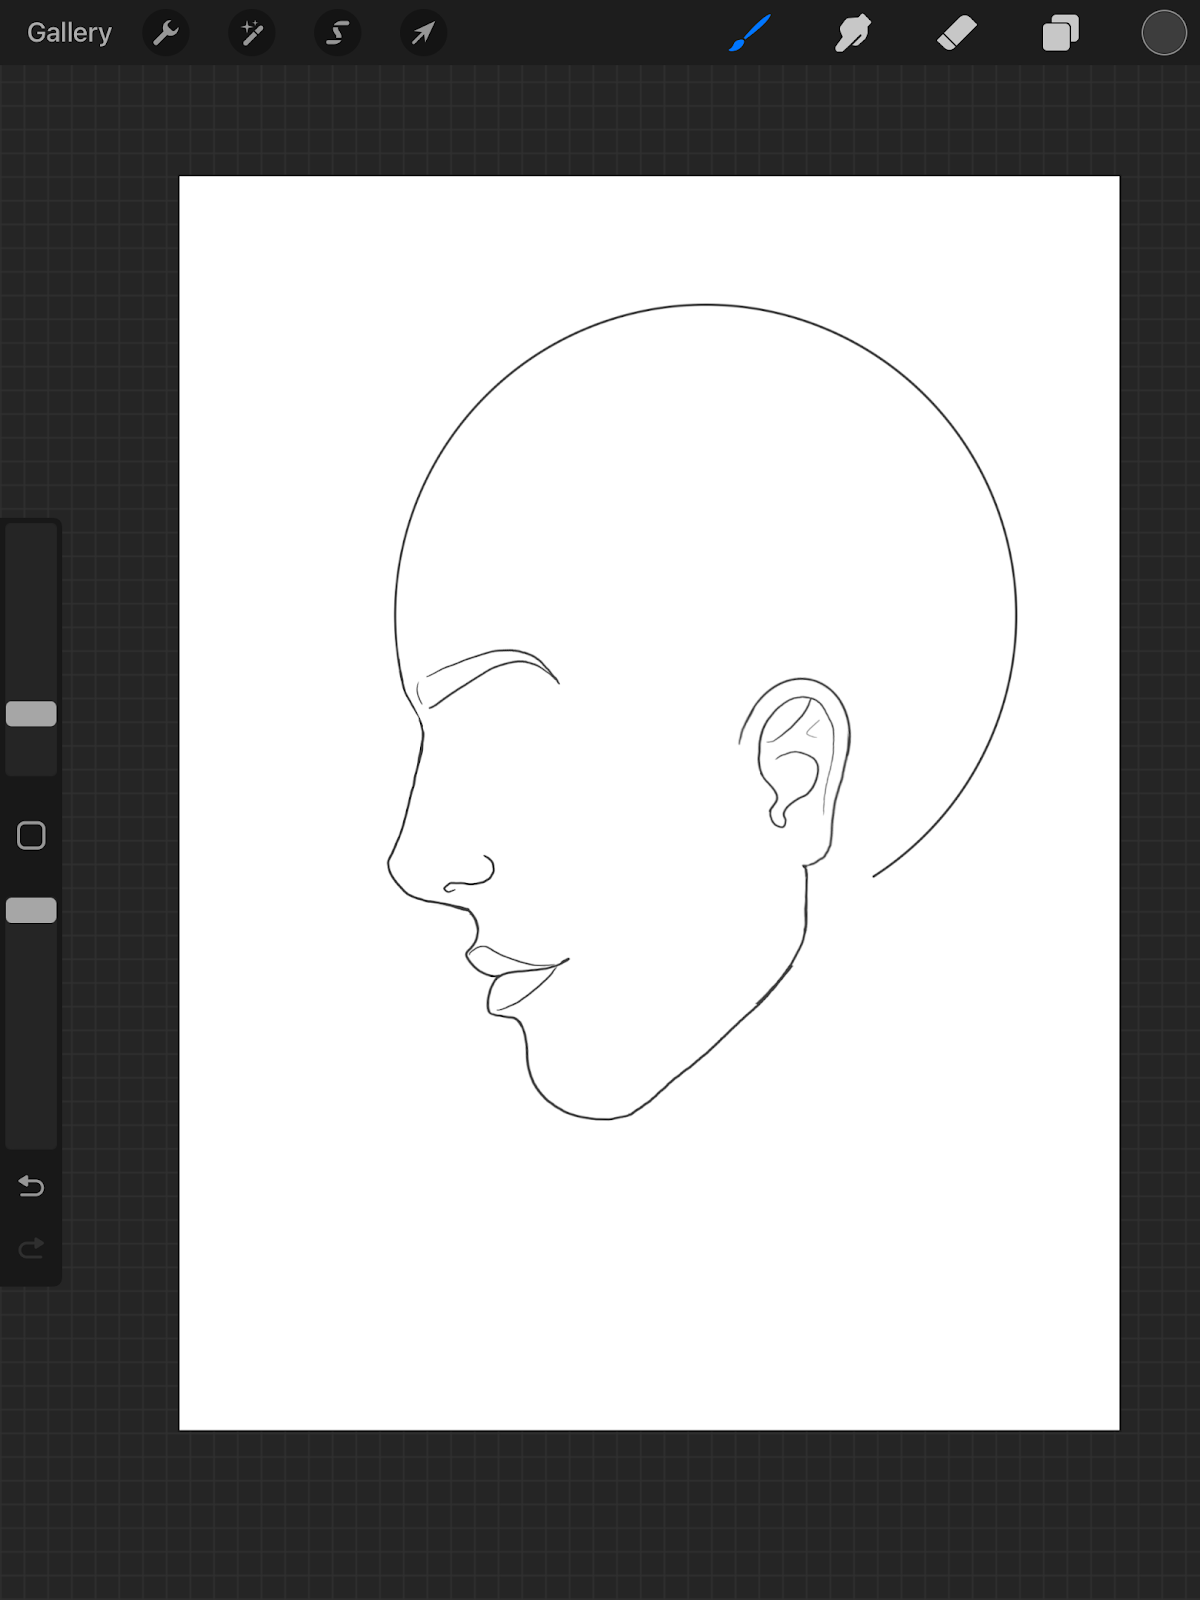
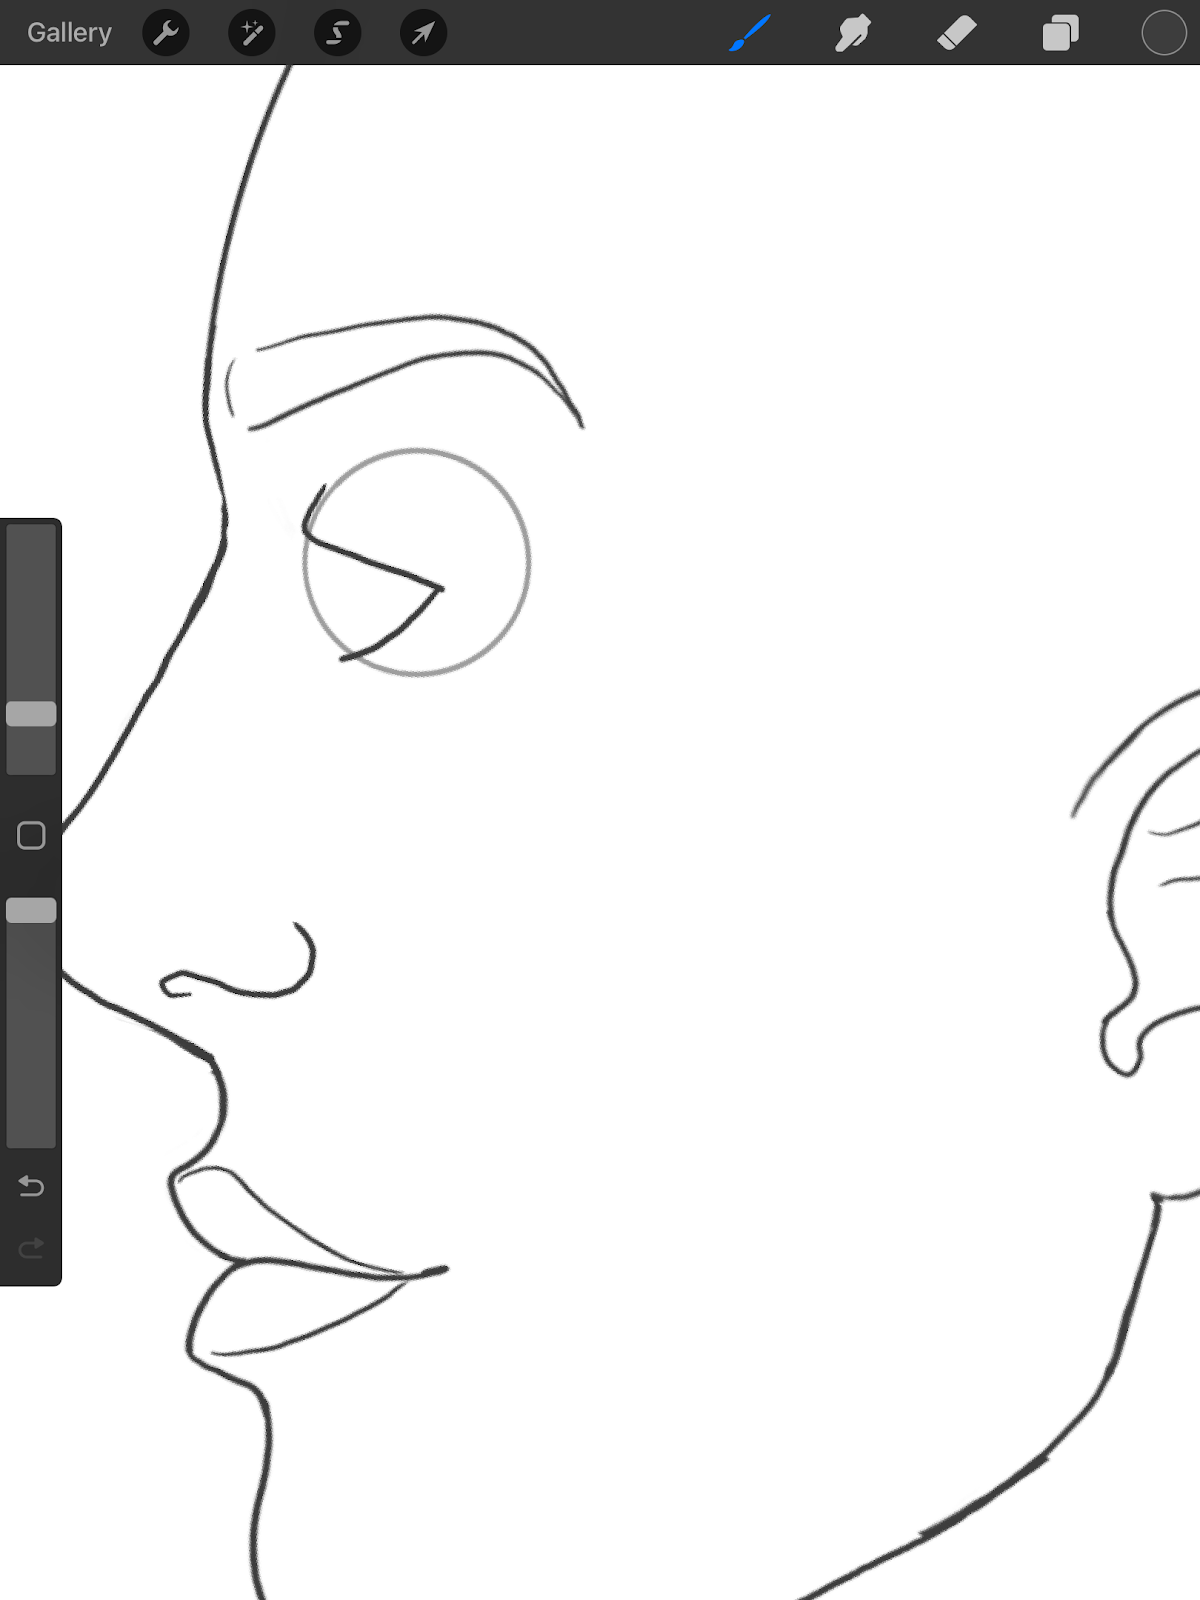
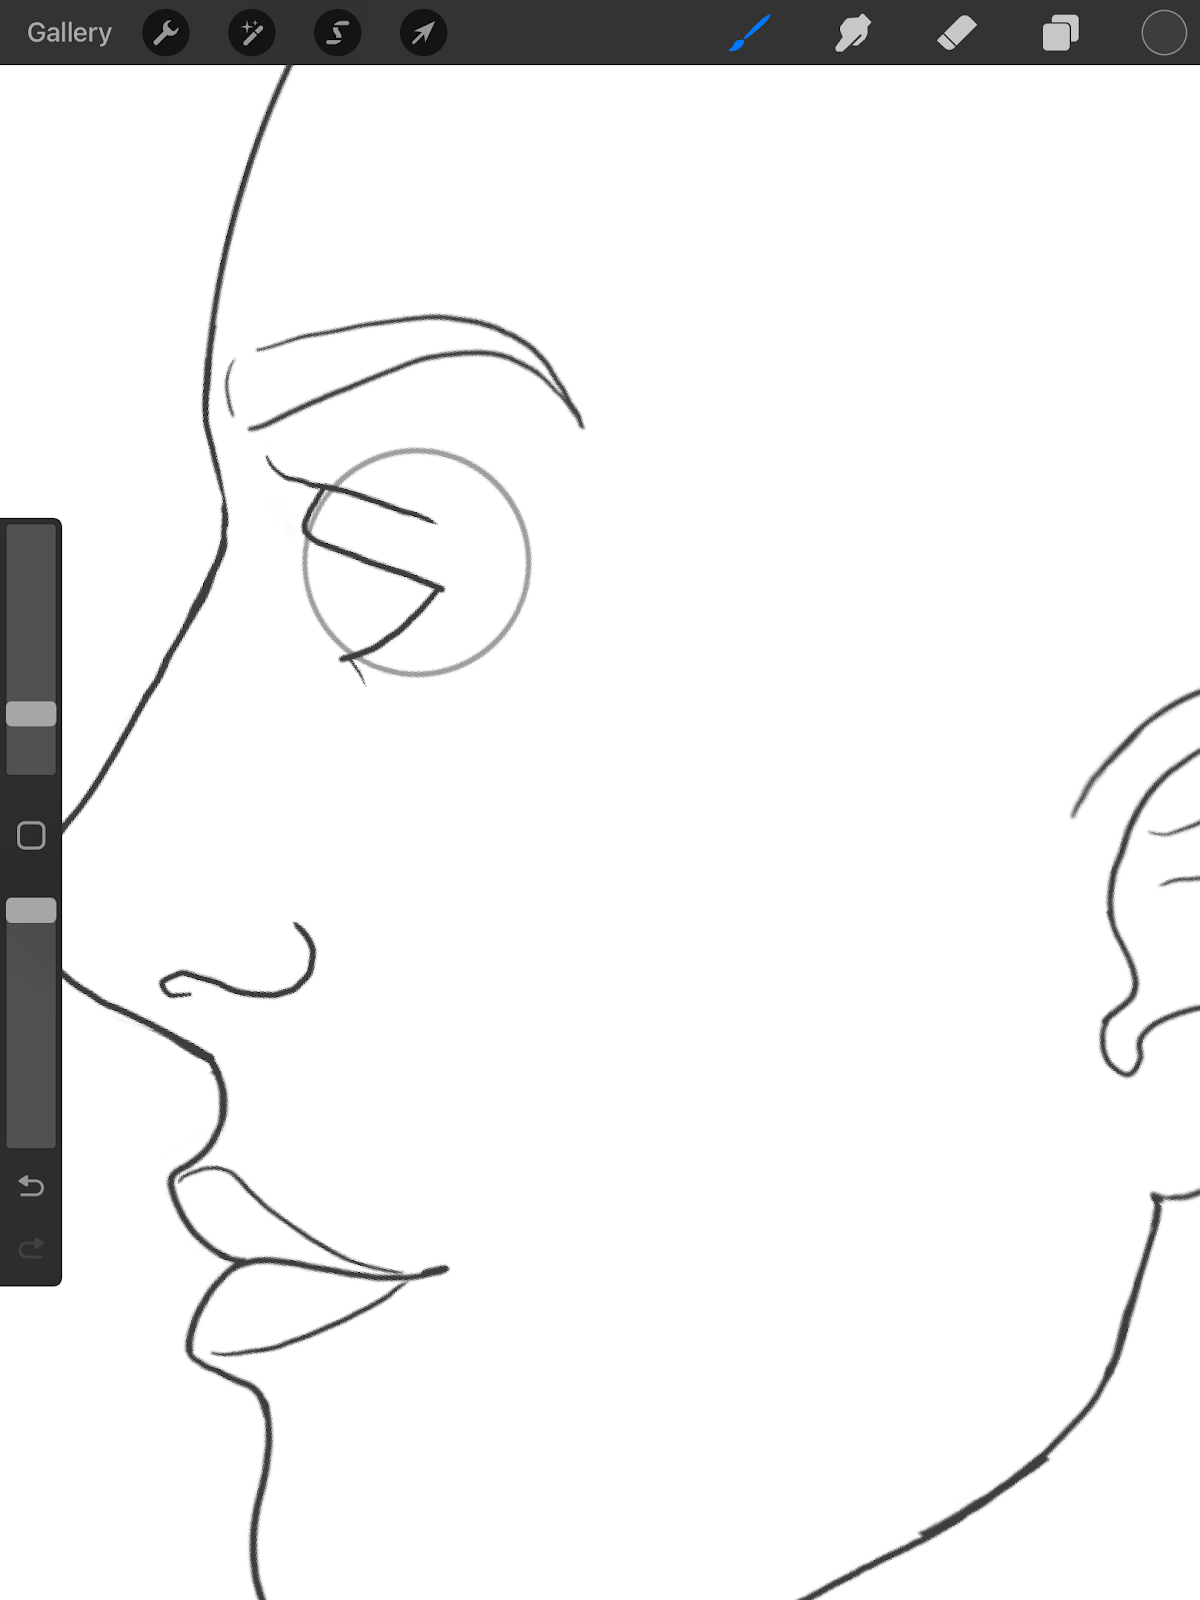
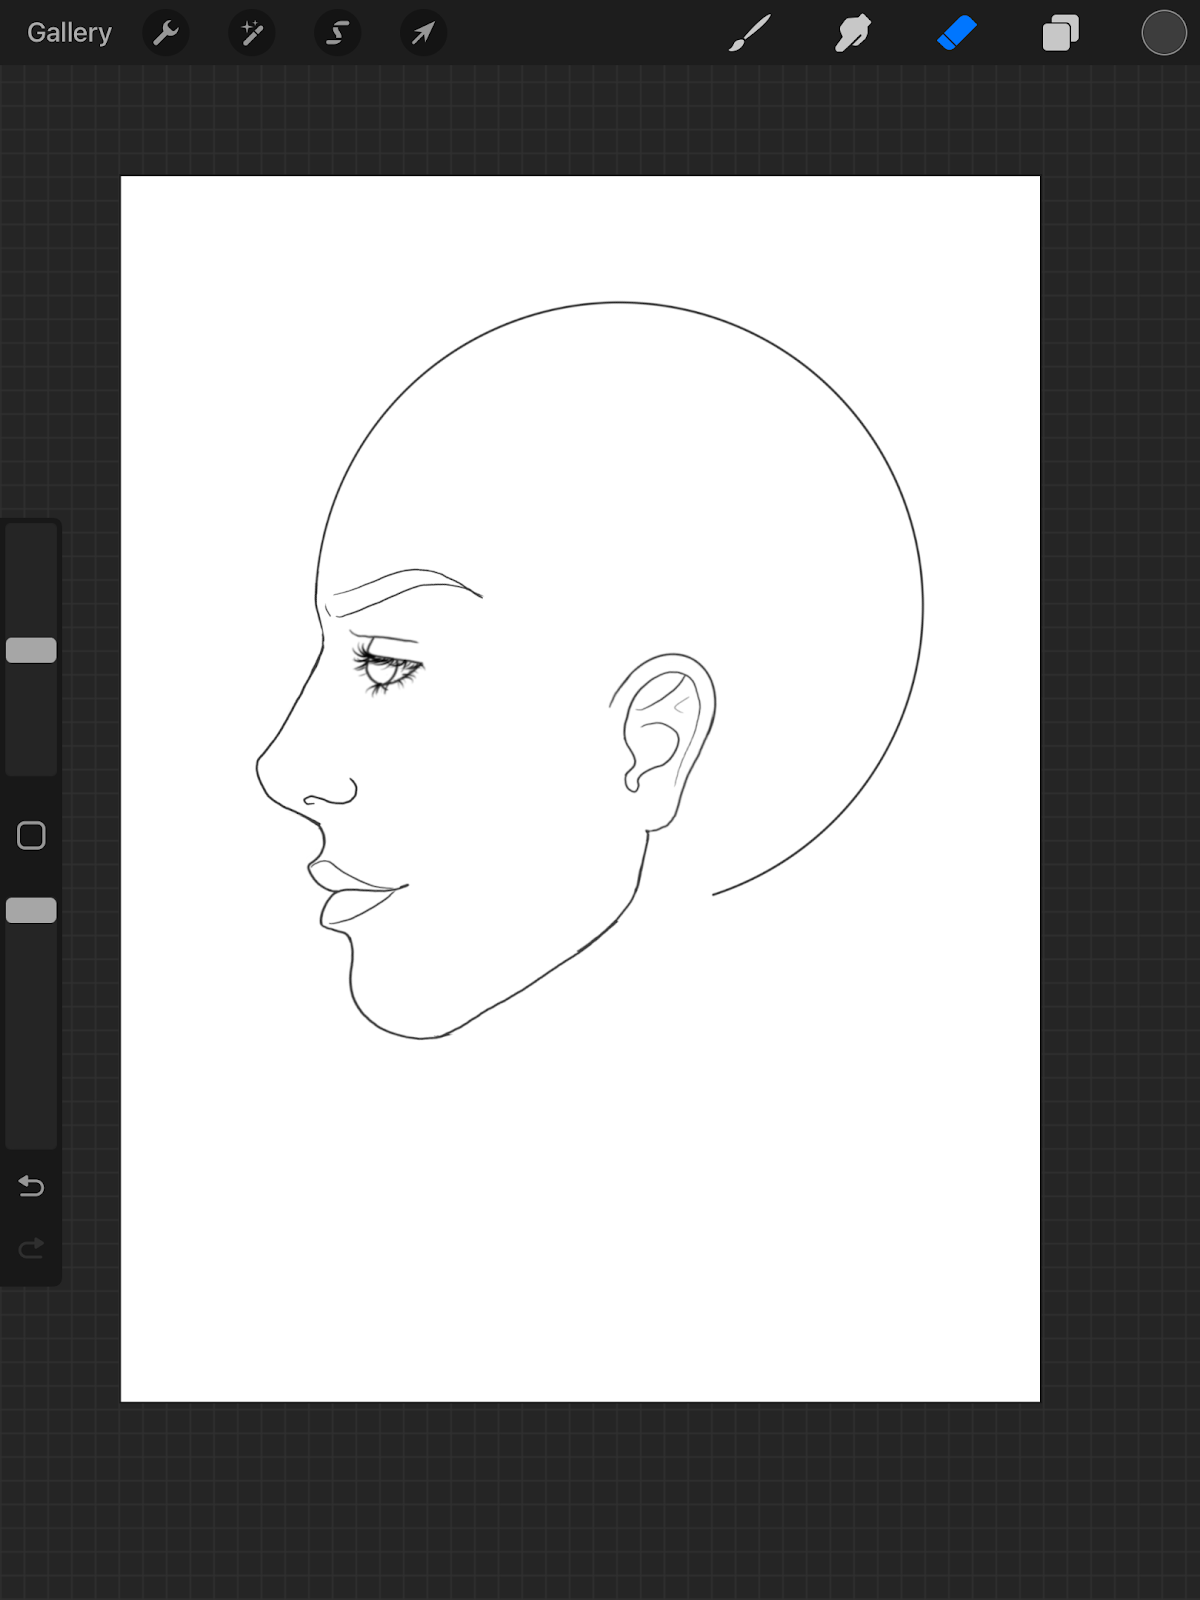
Step one, as always, is to draw a circle, this will be the basis of the skull and your guide. Then, about halfway down the side of the circle start the nose bridge. Pick the size and end the bottom of the nose ready to curve into the lip. Next, we will draw the nostril upon a horizontal orientation. Make a figure 8 that is not quite complete. Make adjustments as needed, don’t be afraid to go with your gut.


Lips
Next thing to draw is the lips. Like the nose, this can be very varied. If the person has a wide mouth, you will see more of it, whereas a narrow mouth will appear to be small even if the lips are not. Some people have lips that extend the same length. Others have one lip that protrudes more than the other. Choose what is best for your muse. The top lip will slope down, but don’t draw the mouth line yet. The bottom lip will come up to meet the top and then extent the mouth line. The bottom lip should generally be rounder than the top, ending with a relatively sharp turn to curve the other way into the chin. Then we will outline the lips. The top lip should quickly get shorter as it approaches the corner of the mouth, while the bottom lip can stay rounded for longer. It might appear the two are not even and that’s okay.

Chin and Jaw
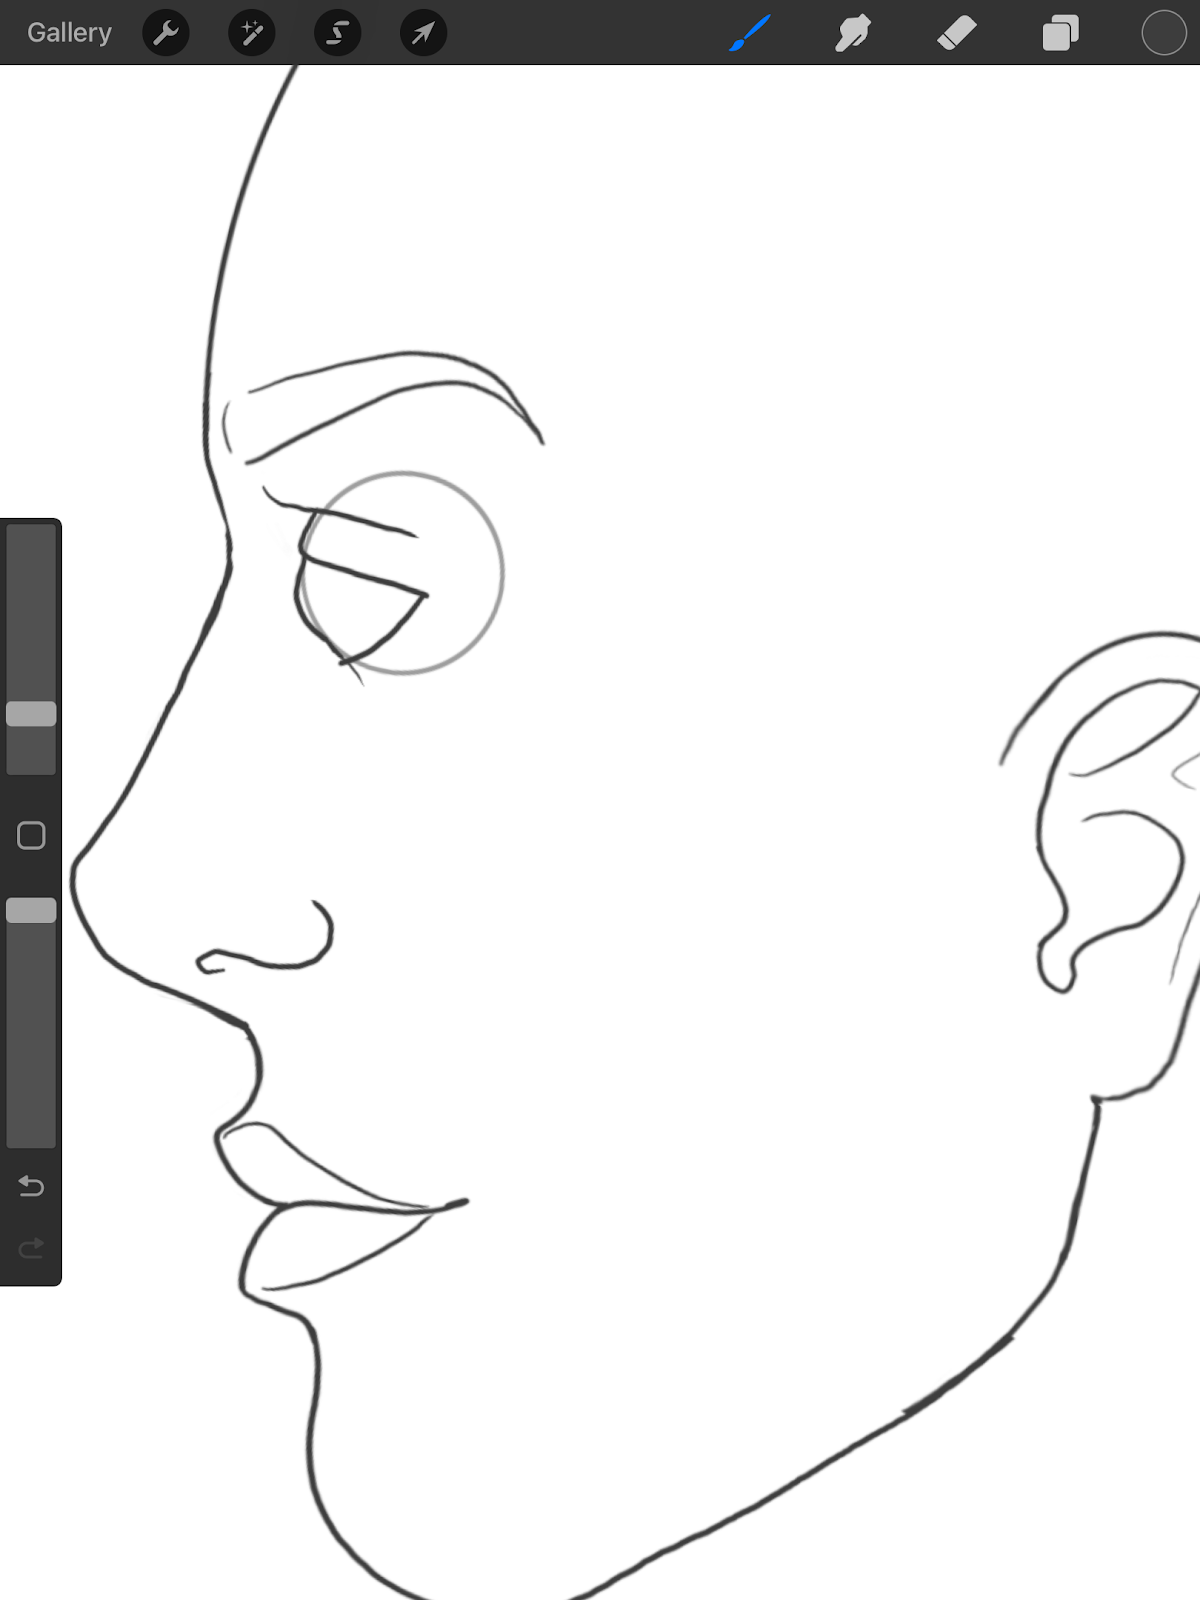
The chin is fairly simple, simply curve it out to approximately the protrusion of the lips and then bring it back and up into the jawline. The more feminine the jawline the more steep and soft it will ascend to the ear. Stronger jaws may go straight down from the ear before curving towards the chin.

Ear
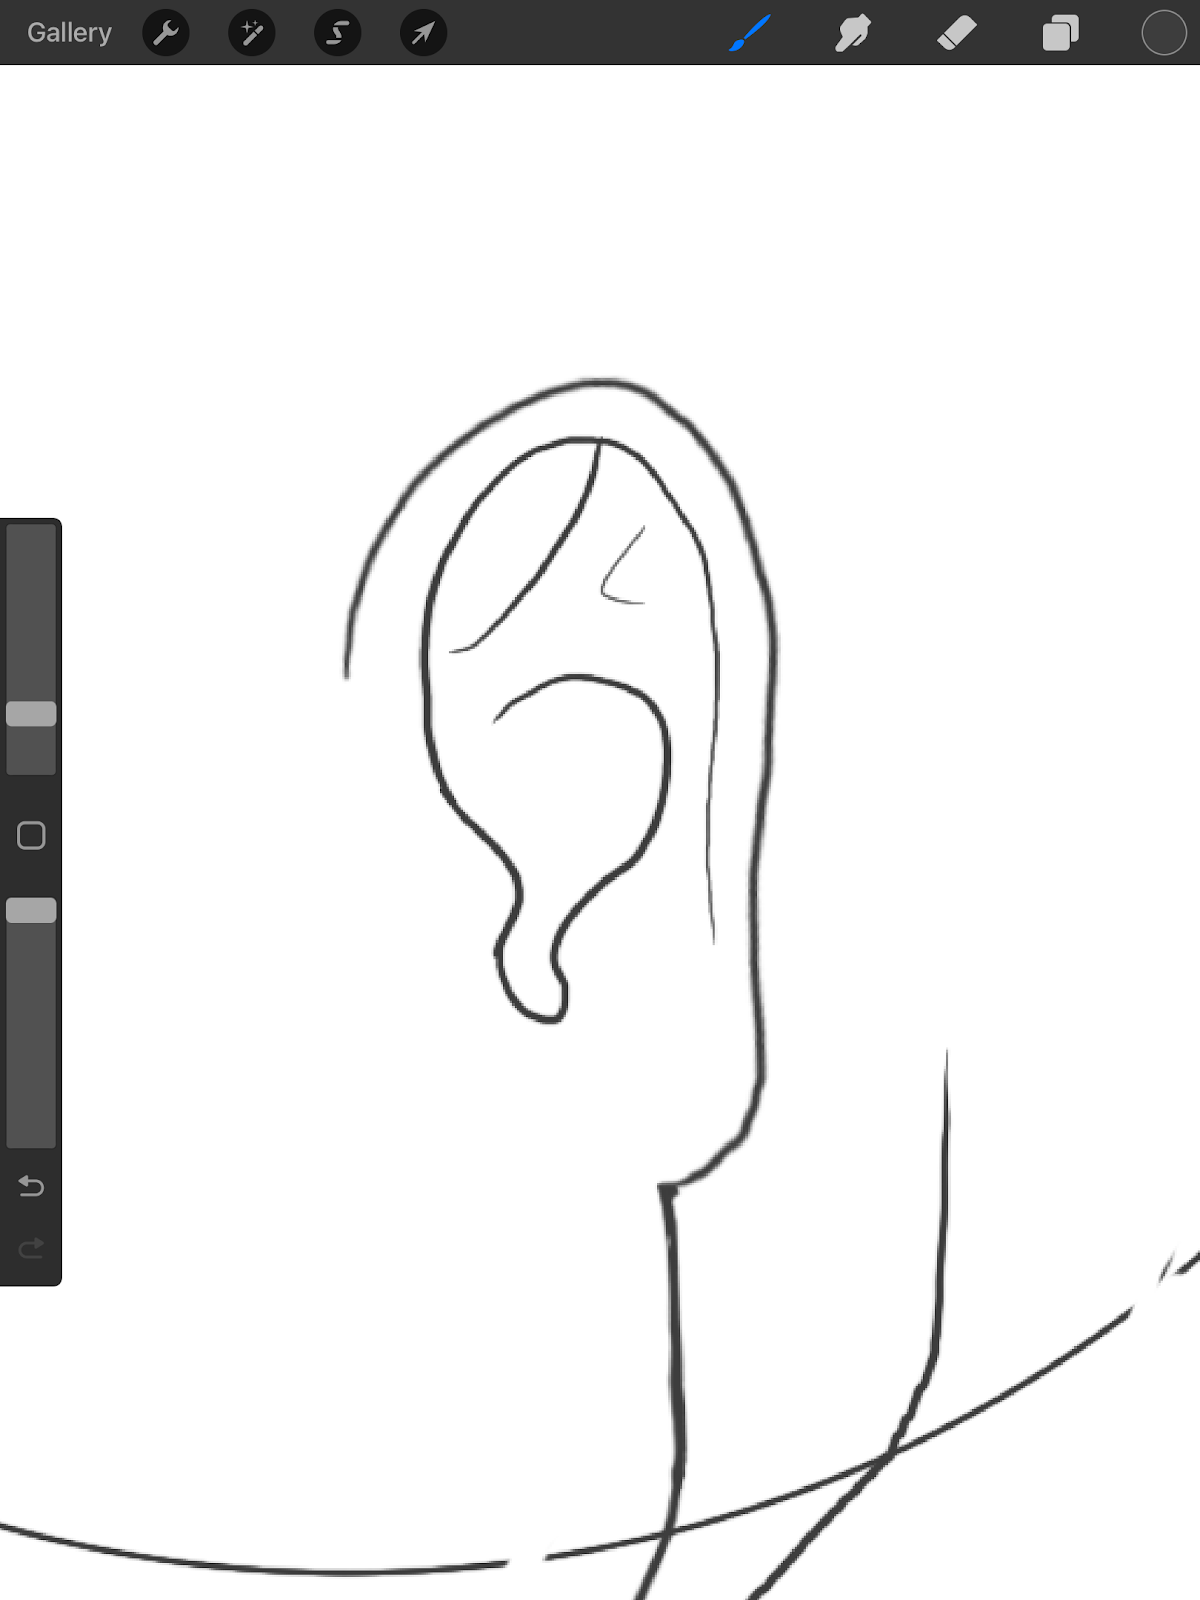
The placement of the ear is simple. It should be in the center of your circle. To start the ear make a question mark shaped line. Curve the bottom inward. The top of the ear should be level with the top of the nose bridge, the bottom should be in line with the corner of the mouth. Next we will create the crest of the ear. Create a small rounded arrow pointing towards the outside of the ear. From the top of it, extend a line that follows the edge of the ear and fade it when you reach the earlobe. Now, at the top of the ear create a shallow crescent line that curves opposite the top of the ear. It should slightly be angled up. Mirror that below it going the other way. In the wide area of the shape create a steep curve so the shape looks like an angled Y. Next, make a swooping squiggles starting at the bottom of the little arrow shape and connect to the bottom crescent shape, as shown in this picture.


Eye and Eyebrow
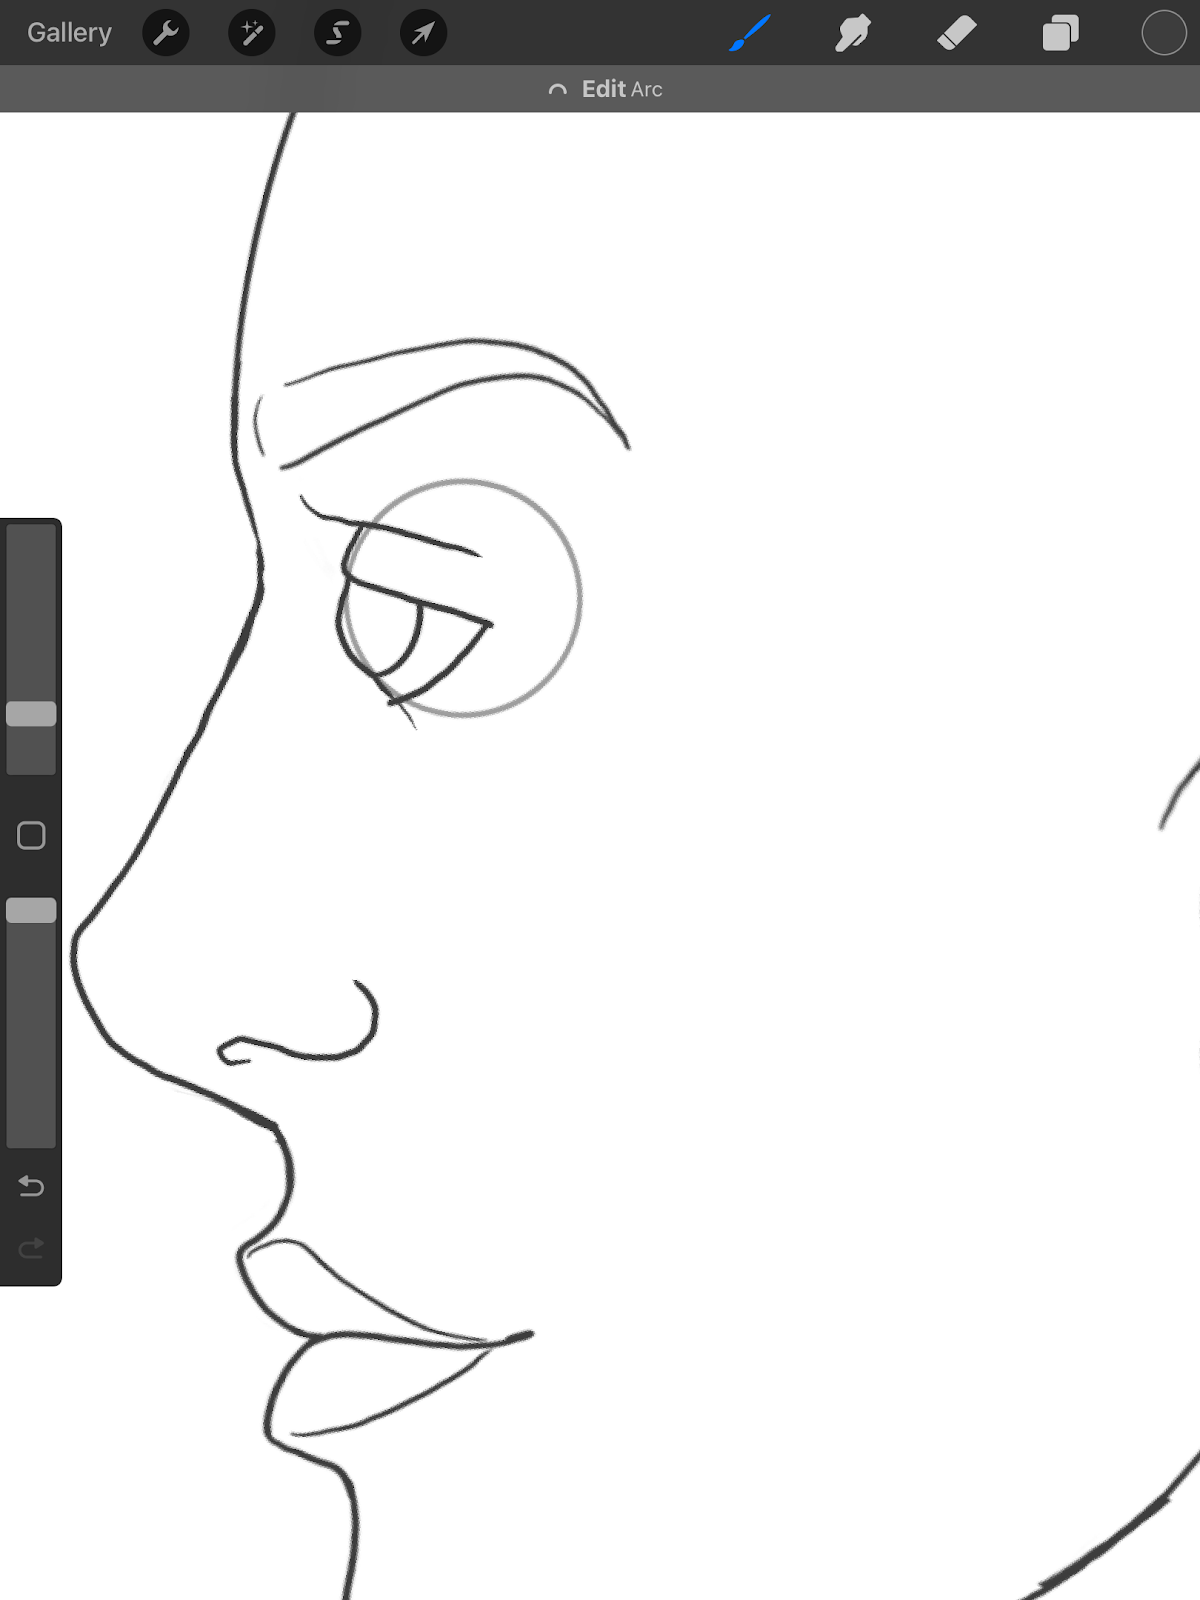
The eyes are probably the hardest aspect of drawing a side profile. Draw a circle in line with the top of the nose bridge. This is your eye which we will draw the eyelid around. Start with a line going from the brow ridge and slightly angling downward, this continues the brow bone. Next, draw the lid following the shape of the eye. Make the lid angle down to about ⅓ though the eye. Then make the lower lash line so the final product is a sharp, sidewise V. Add a small bump on the eye where the iris is, because the lens of the eye is not perfectly round.
Adding the eyelashes is simple. The eyelashes should grow straight out but curve up slightly. The key is to draw them in the same direction as you continue down the lash line, this will then end up covering part of the eye, rather than going straight up. Remember to draw the eyelashes on the other side of the eye, appearing behind the eye. The bottom eyelashes are simply downward curved from the lower lash line. Draw the iris in whatever direction your person is looking.
From the side, the eyebrow will appear overly arched. This is because we are viewing the arch from the side, which appears to shorten it. Depending on the structure of someone’s face, it can appear to start below the top of the eye. The straighter the eyebrow, the less curved it appears to be.

Drawing the Neck
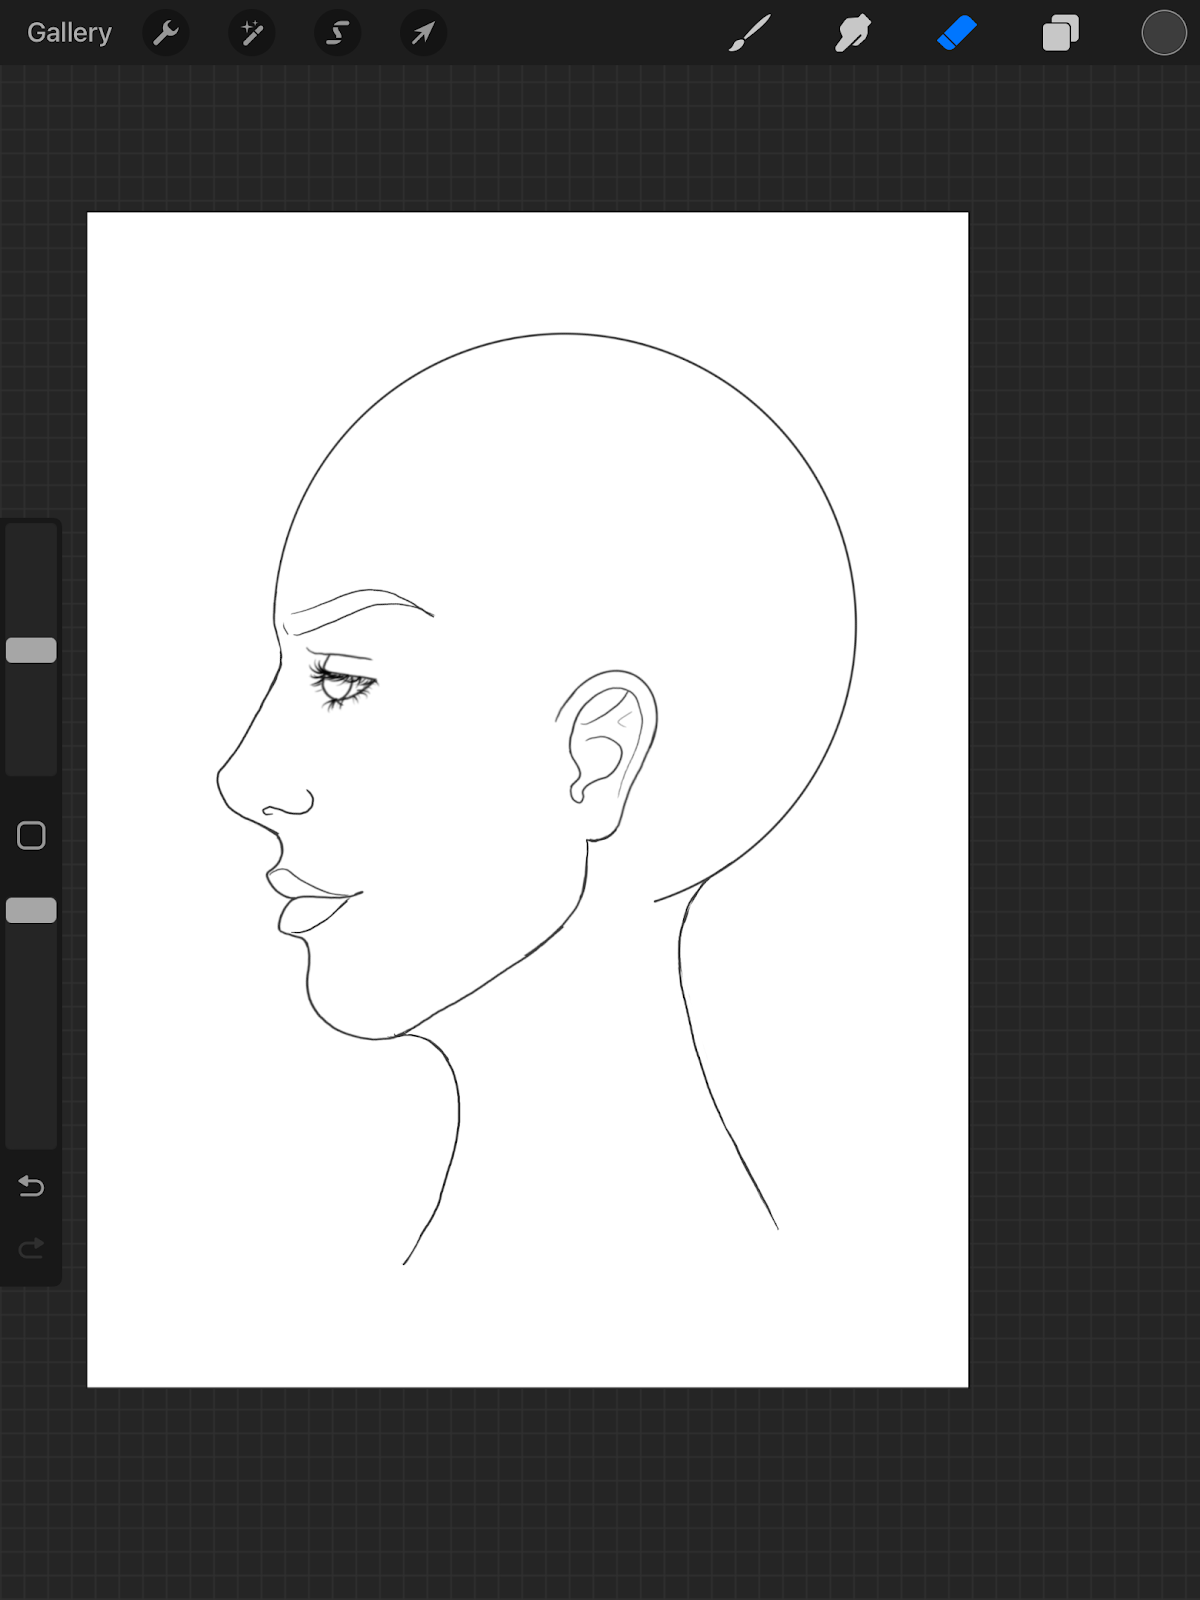
The neck should start at the bottom of the chin so it is one, continuous, gentle line. It should steeply curve back, before gradually curving down and back forwards. The back of the neck should start much higher up and me a much straighter line.
Hair and Hairline
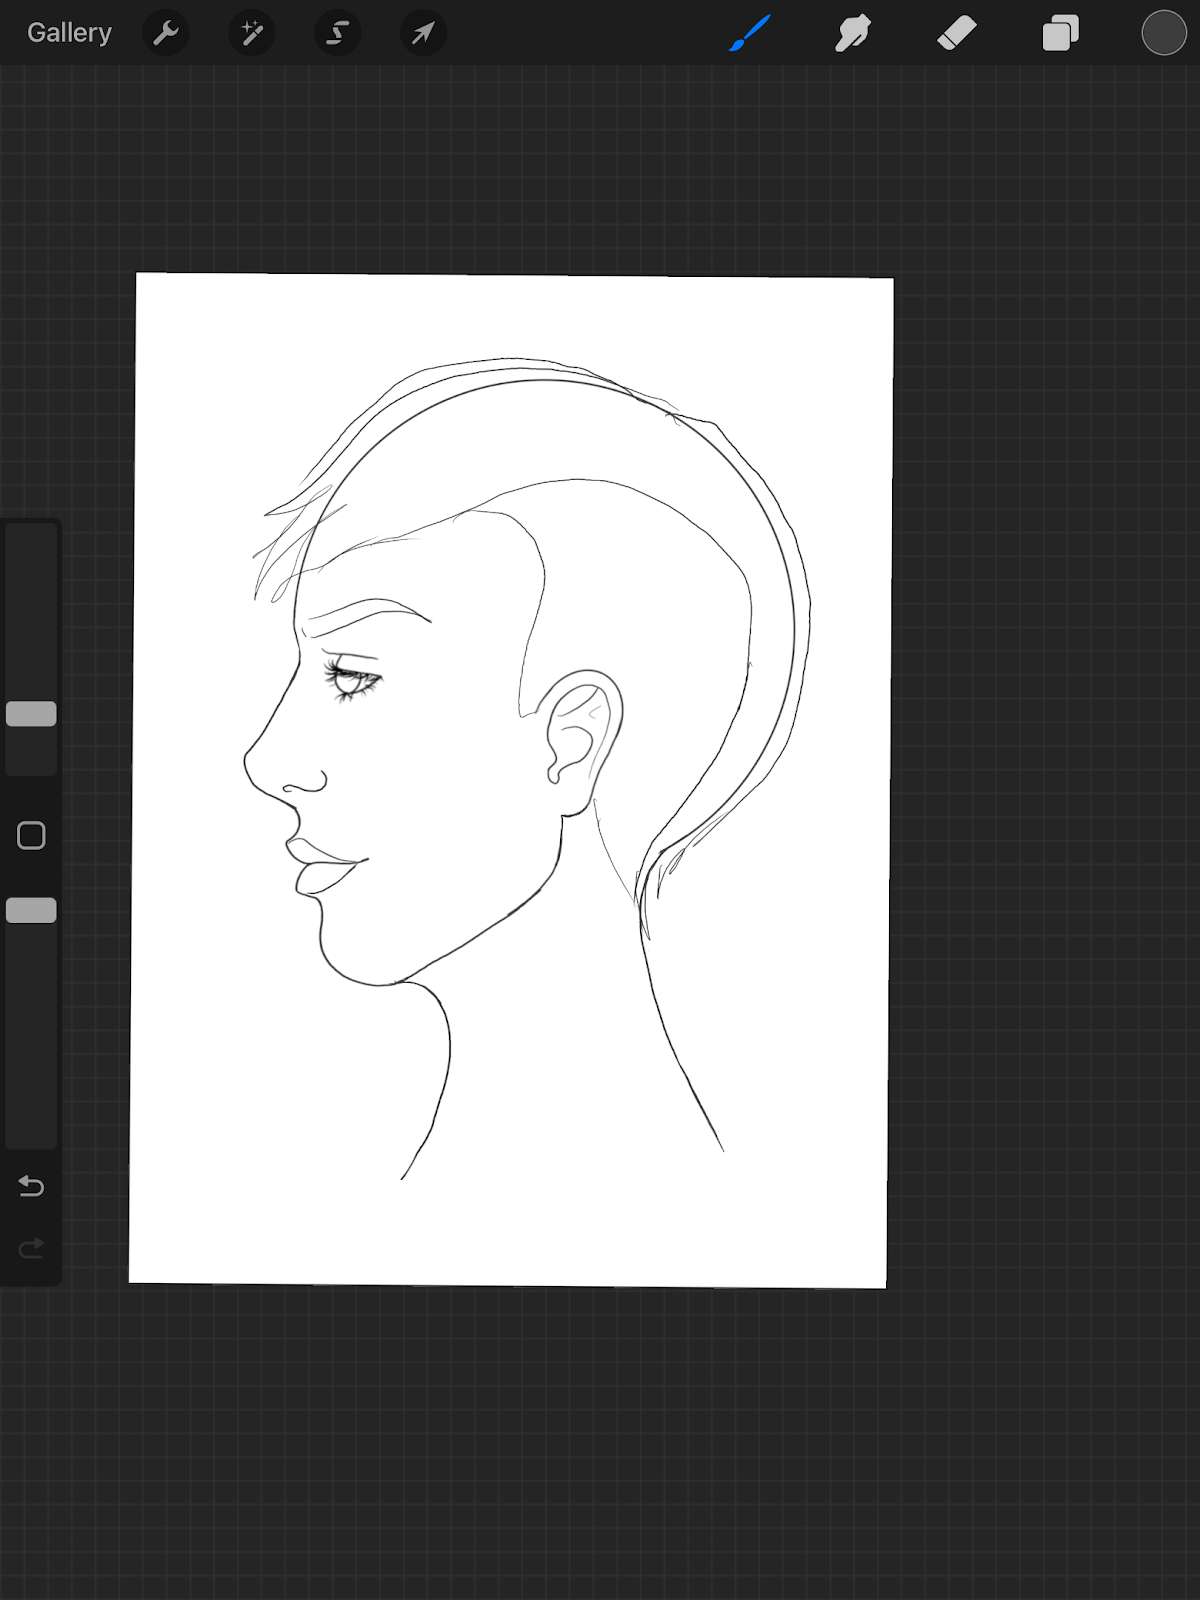
The hairline should start halfway between the eyebrow and the top of the head. Hair can be very personalized. If you are drawing short hair, remember that the hairline isn’t one straight line, it generally will recede slightly at the temples before growing forward again. If someone is wearing their long hair down, the hair should fall straight down just behind the eyebrow. You can also tuck it behind the ear. If you want to draw bangs, remember that they should extend close to the ear, not just the front of the forehead.


Finishing Touches
Feel free to go with your gut and change things as you see fit, You may notice that I myself made adjustments as I went. Remember to continue to practice, it takes a long time to get used to drawing anything, especially people. If you want more tutorials like this, I encourage you to read more of my blog posts on allisterarts.com.